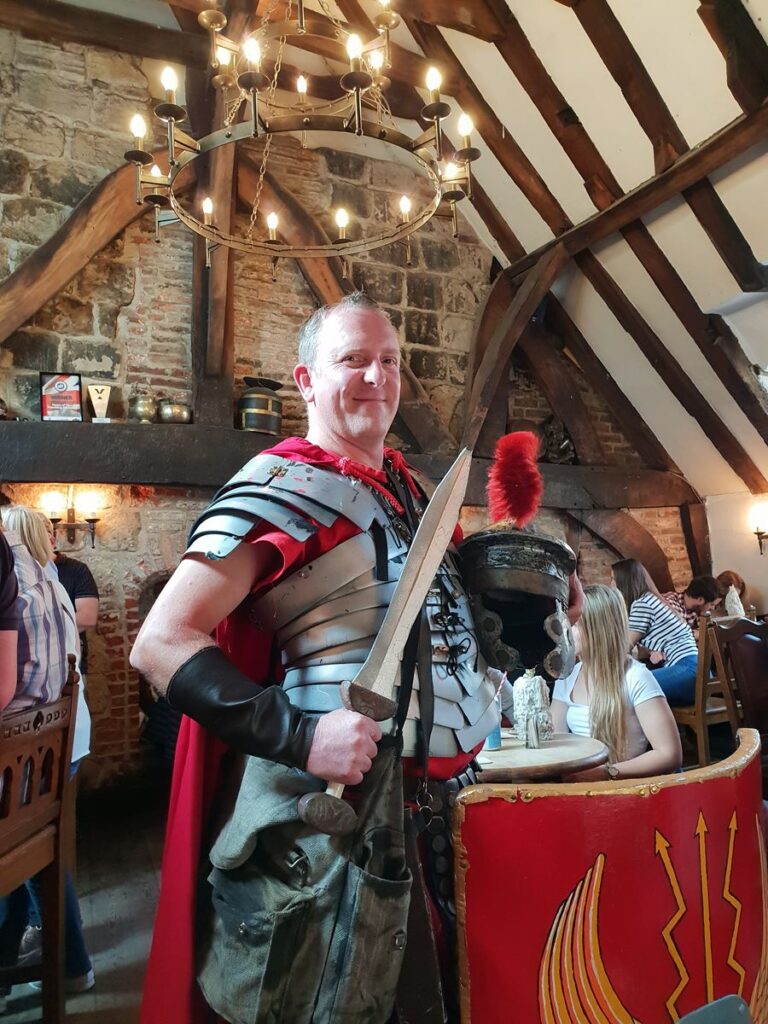
Upstairs in the original House of the Trembling Madness, York
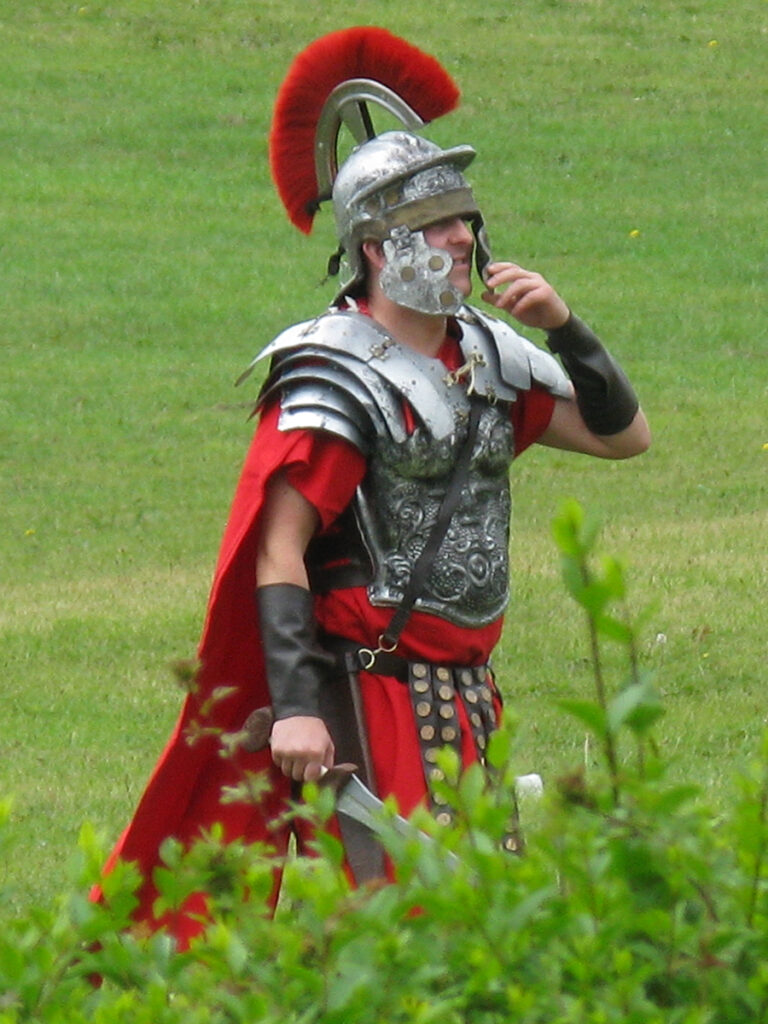
A walk on the field opposite my house before going out on one occasion.
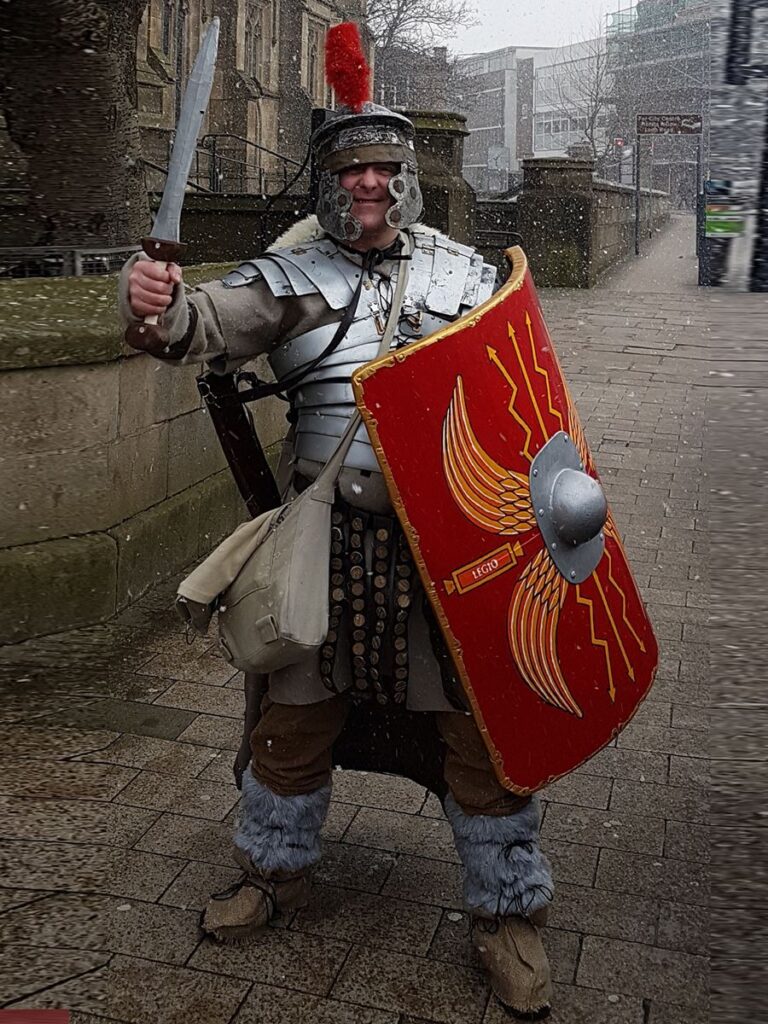
In Leeds on the way to York in Winter Gear for the first time.
Drinks in Warrington before going to Creamfields in 2008.
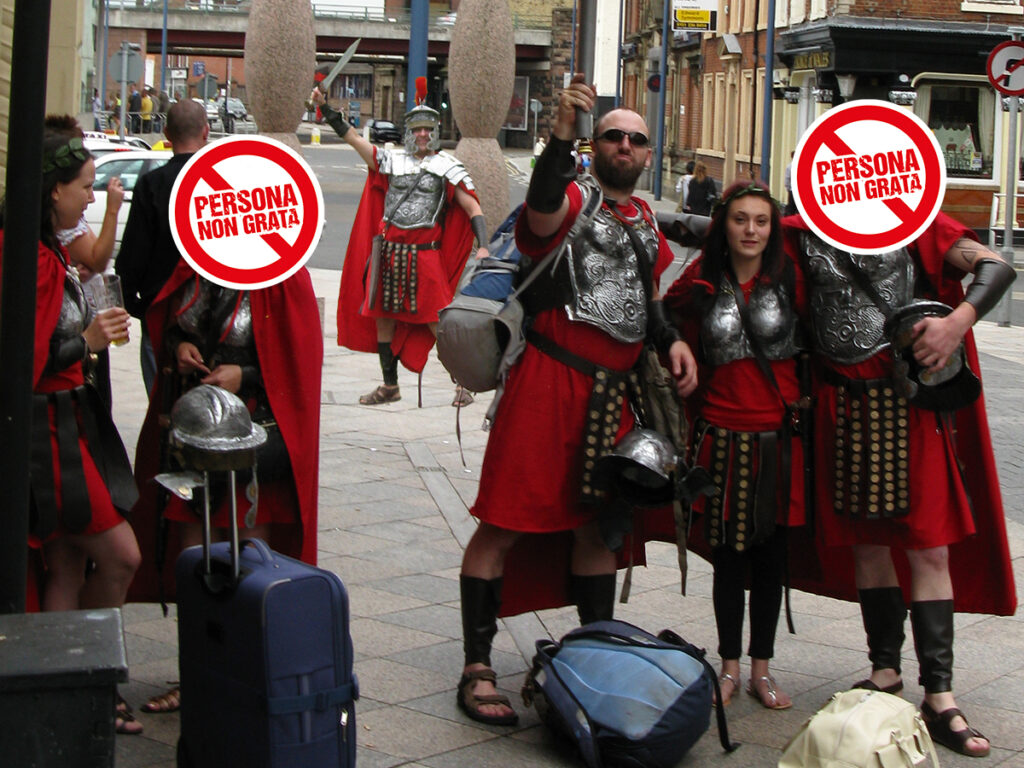
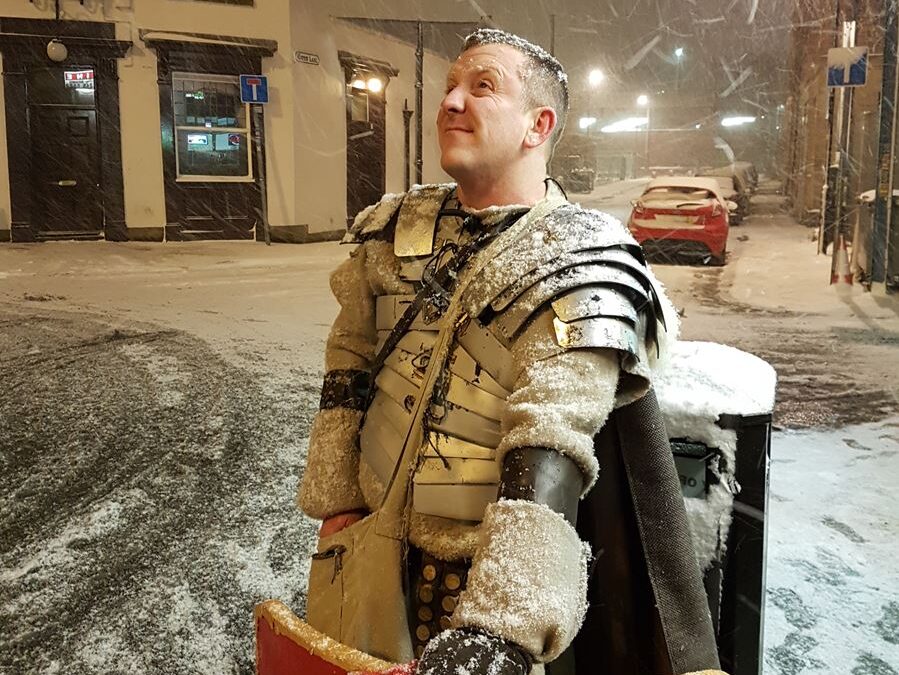
in 2019 I invaded a Roman Event in my home made rubbish. The crowds of families and tourists loved it as they got to take lots of photos with me, but the re-enactors probably weren’t impressed.
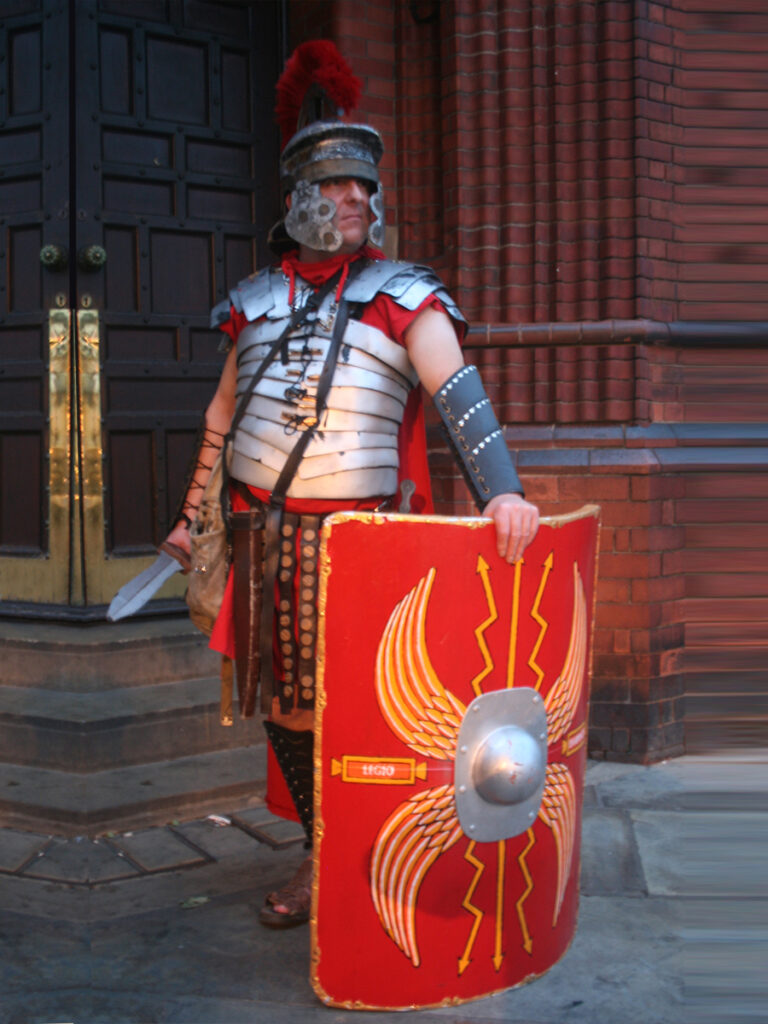
A trip to York in 2010, now using some improved items but it would be years before the shield was upgraded.
Why
I learned about the Romans in junior and secondary school and how they looked 2000 years ago. I was quite fascinated. In 2000, the magnificent Ridley Scott film Gladiator came out and I knew I HAD to have some Roman armour (even though it looked different to this). I was going to Cyprus with my friends on holiday and I thought it would be brilliant if we had a few nights out as a small team of Legionaries. That didn’t happen, but I did begin working on some armour parts. It wasn’t until 2008 that I resumed the project so I could go to Creamfields as a group of 6.
Very little about my version is even vaguely accurate but it doesn’t matter to me. I think it has some low -level charm because it’s a crappy emulation rather than faithful reproduction.
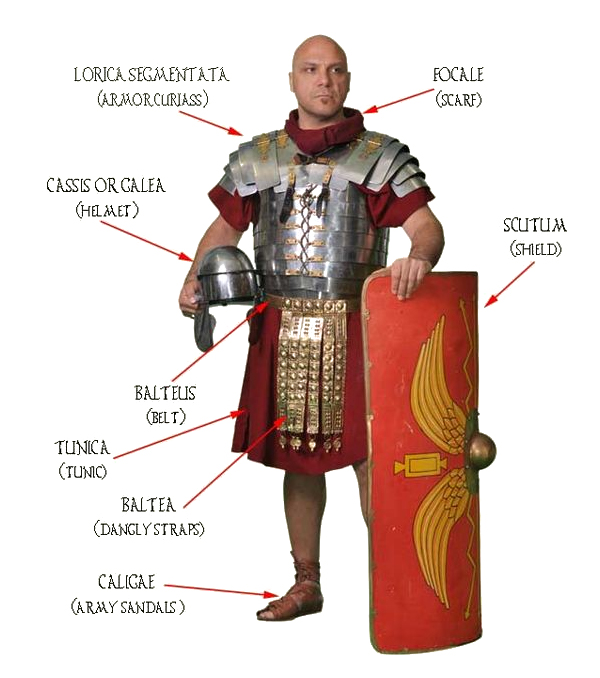
Equipment of Roman Legionnaire (1st century BC). I could be wrong, but the balteus seems to be mislabelled. I understand that to be a cingulum and this soldier isn’t wearing a balteus, which is a shoulder strap/belt.
When
2000, 2008, 2010 and 2018, 2019.
Elements
Including but not limited to: Helmet, lorica segmentata (torso armour), Tunica, Cingulum (belt), Scutum (shield), Pugio (dagger), Gladius (sword), Greaves (shin guards), Bracers (forearm guards), sandals. Also, for winter version, sheepskin and other winterwear.
Amount of Work
Loads. I made 6 sets of the more basic armour. I only made on set of the segmented armour. I began that in 2008 but resumed it in 2018.
Level of use
Quite a few times as original versions and upgraded version. About twice for winter version.
Notes
The 2000 project was too ambitious and difficult and although I did get a fair way into making and assembling Lorica parts, I ran out of time and chose to not continue after the holiday.
Future use
Will possibly wear it many more times. I could possibly buy replica armour, and although that would look great, it would kind of take some of the fun out of wearing something I’d made myself, even if mine is a bit inauthentic.
Making it
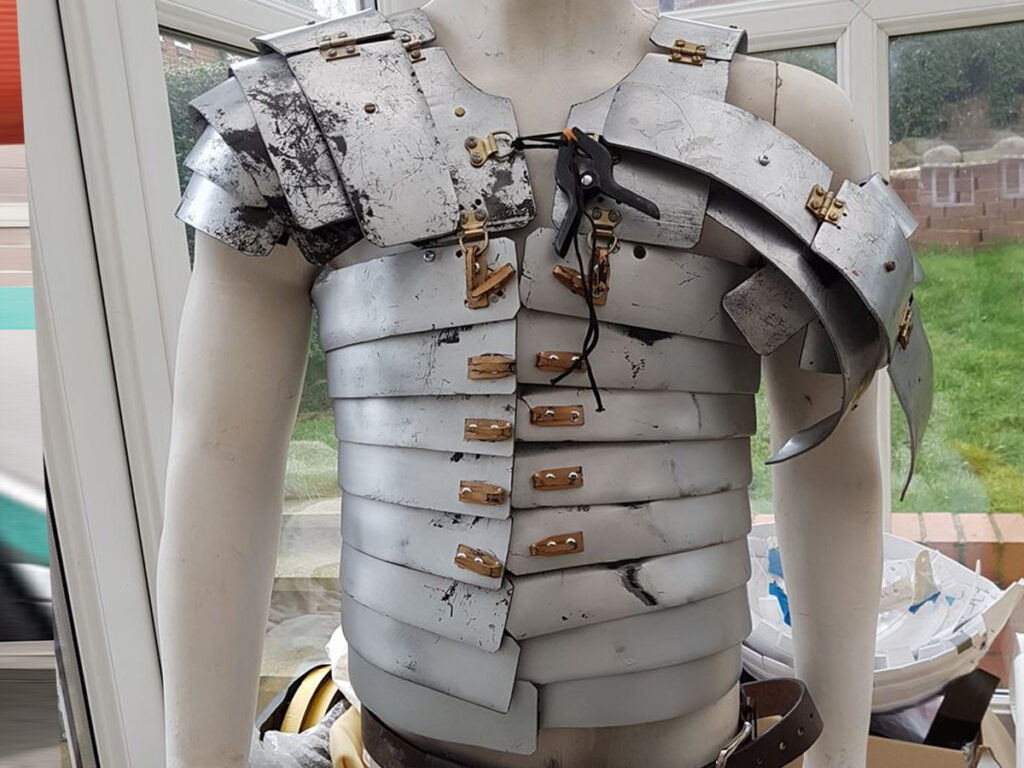
I don’t have a complete photographic record of making these, but there’s still quite a bit to show. There are essentially two main versions of the armour. One with a cuirass (breastplate and backplate) and the lorica segmentata (segmented armour).
Way back in 2000, the first things I bought were some flimsy fancy dress chest plates. It didn’t get off the ground properly and was abandoned.
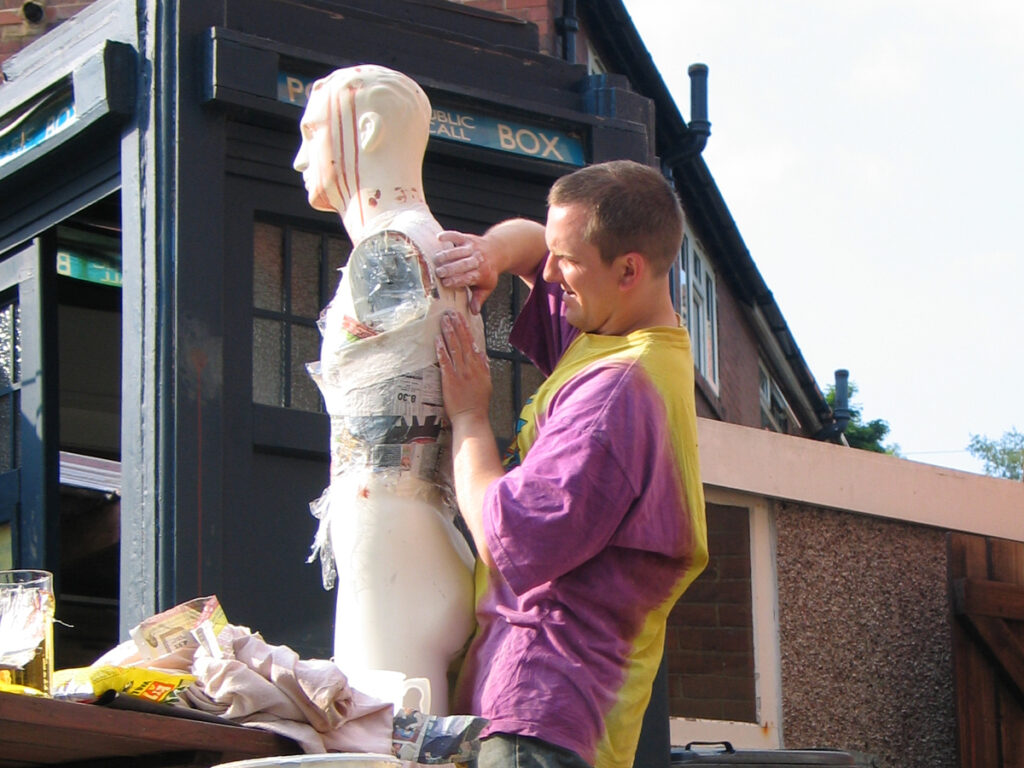
By 2008 I had decided to resume the project and make 6 sets of costumes. The chest plates were reinforced with fabric and paper and back plates were made from scratch with extensive fabric and papier mache modelled onto a mannequin.
The inside of the new back plate and the strengthened chest plate.
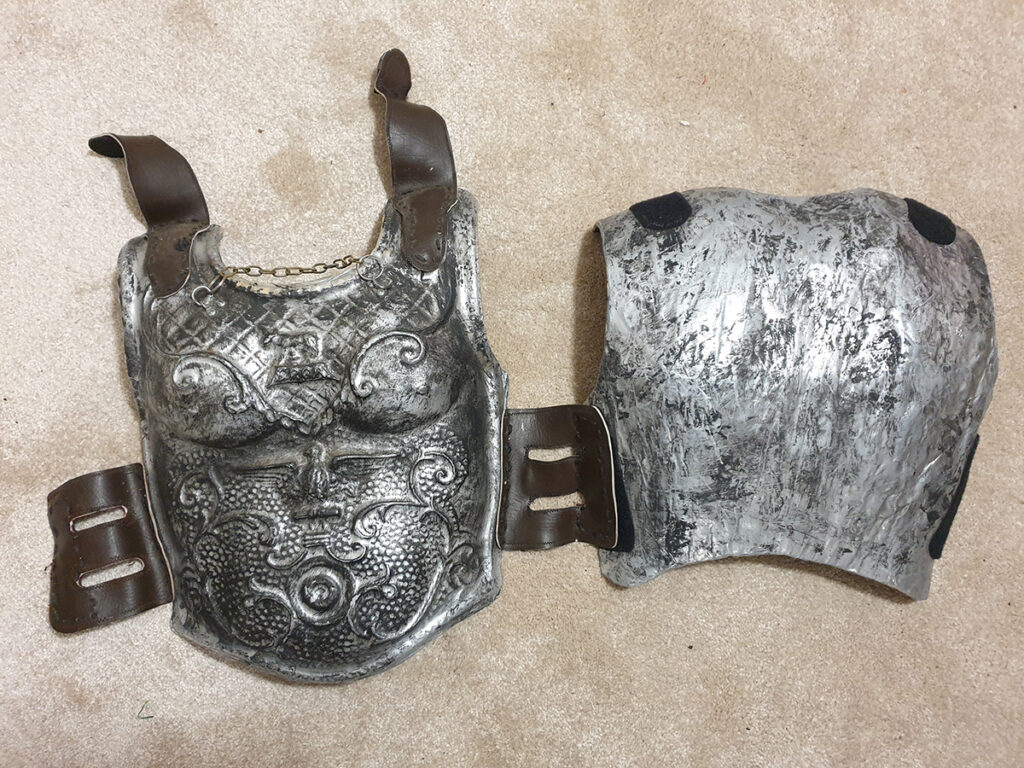
Further fittings were added to make the parts into a cuirass and for the cape to tie onto the chest plate with decoration.
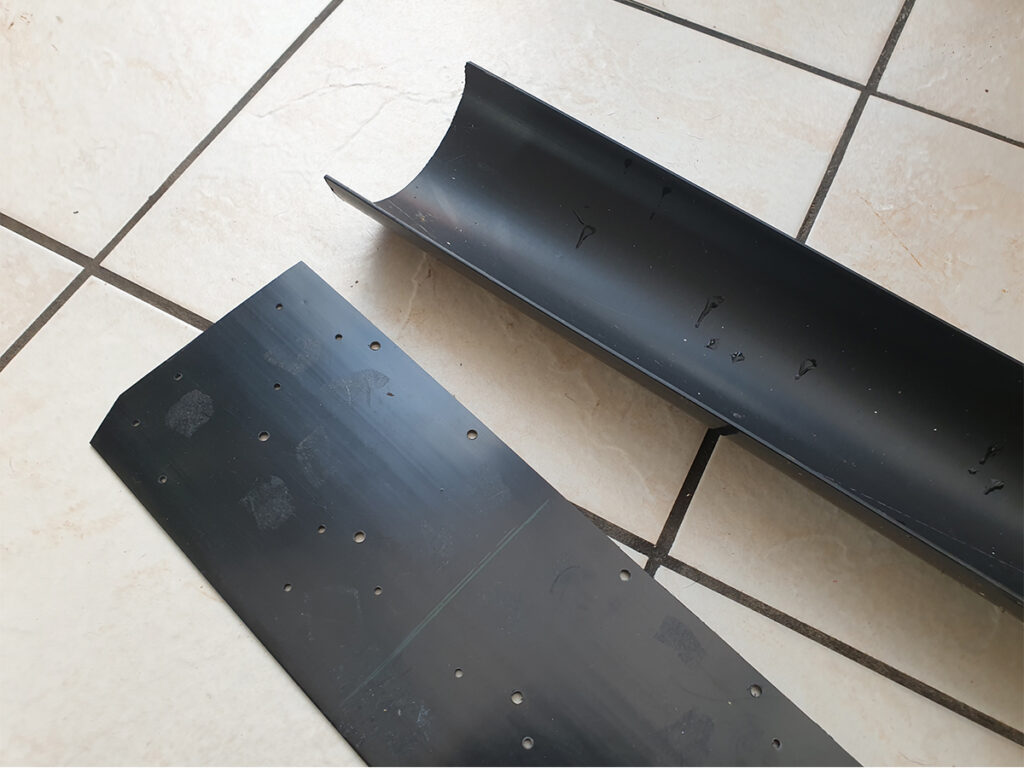
Much of the armour and accessories were made from plastic guttering that had been cut, heated and flattened in my kitchen oven.
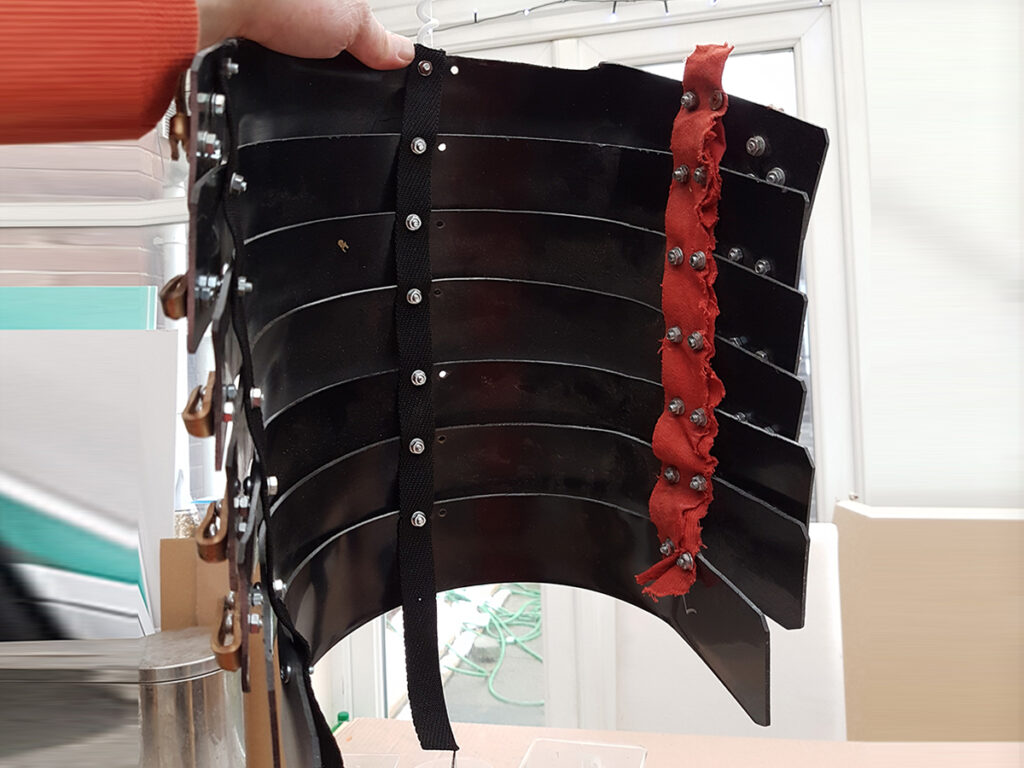
Although the segmented parts had begun in 2000, it wasn’t until later that I was able to resume making full sets. Parts were re-bent with gentler curves by heating them again putting them over anything curved I could find.
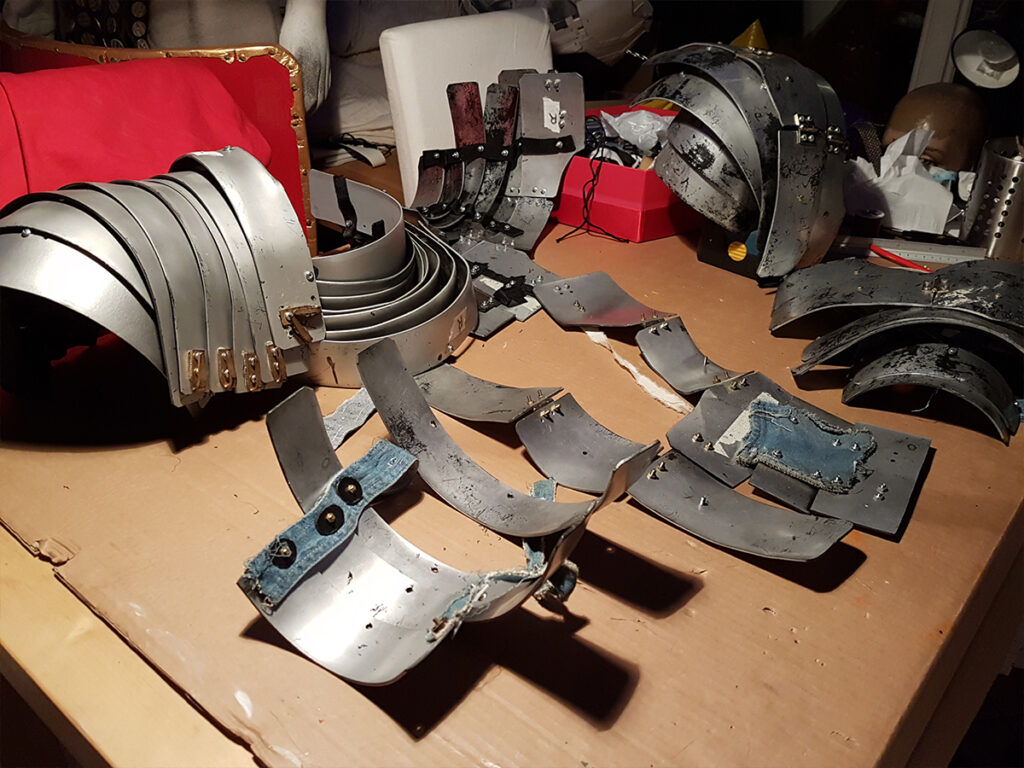
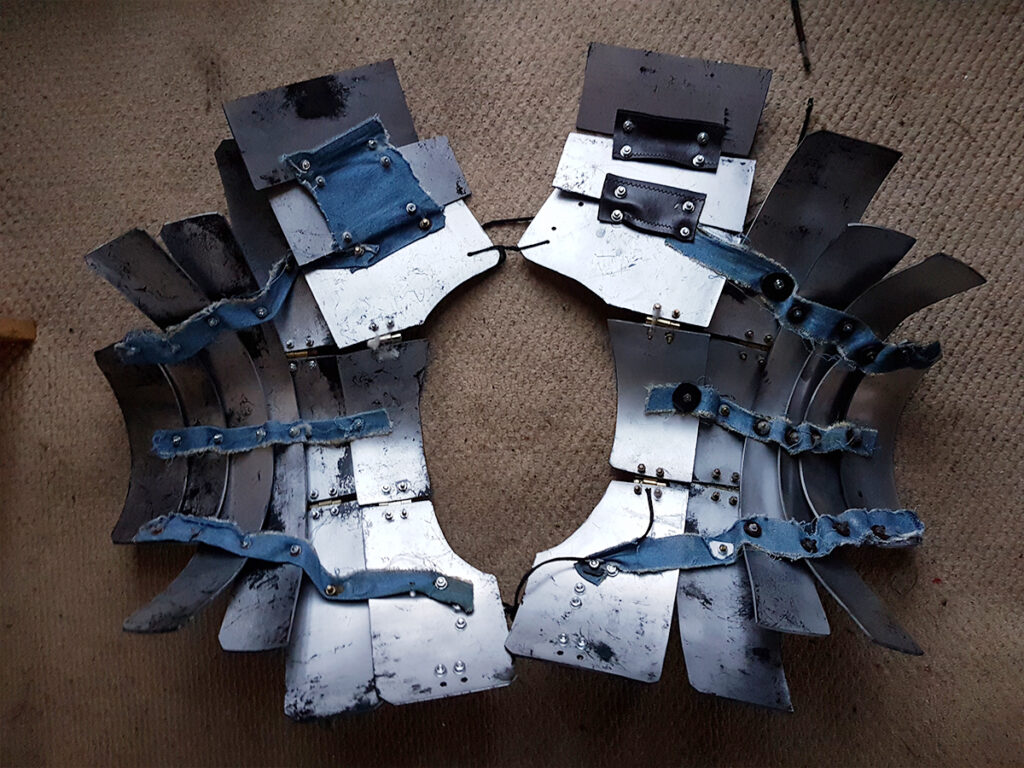
The inside of the shoulder guards shows all the straps that have been bolted to the plates..
The outside of the shoulder guards with the hinges that are bolted on.
Two, of many plastic strips that had been bent around a paint can or something, drilled and painted.
One half of a torso piece of Lorica Segmentata.
The “brass” loop fittings fittings are just more bits of cut, shaped, bent, drilled and painted guttering bolted onto place. This is all very time consuming.
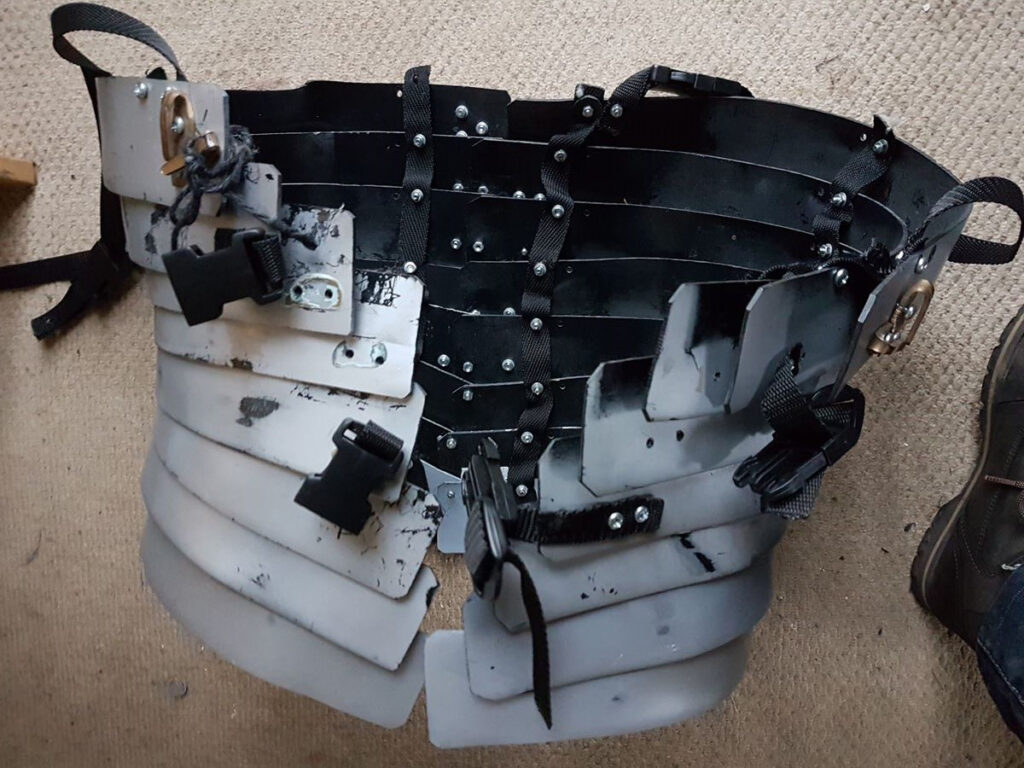
The rear view of the piece with click fittings at the back, because there’s no way I could or would lace this bugger up or down each time I wanted to don or doff it.
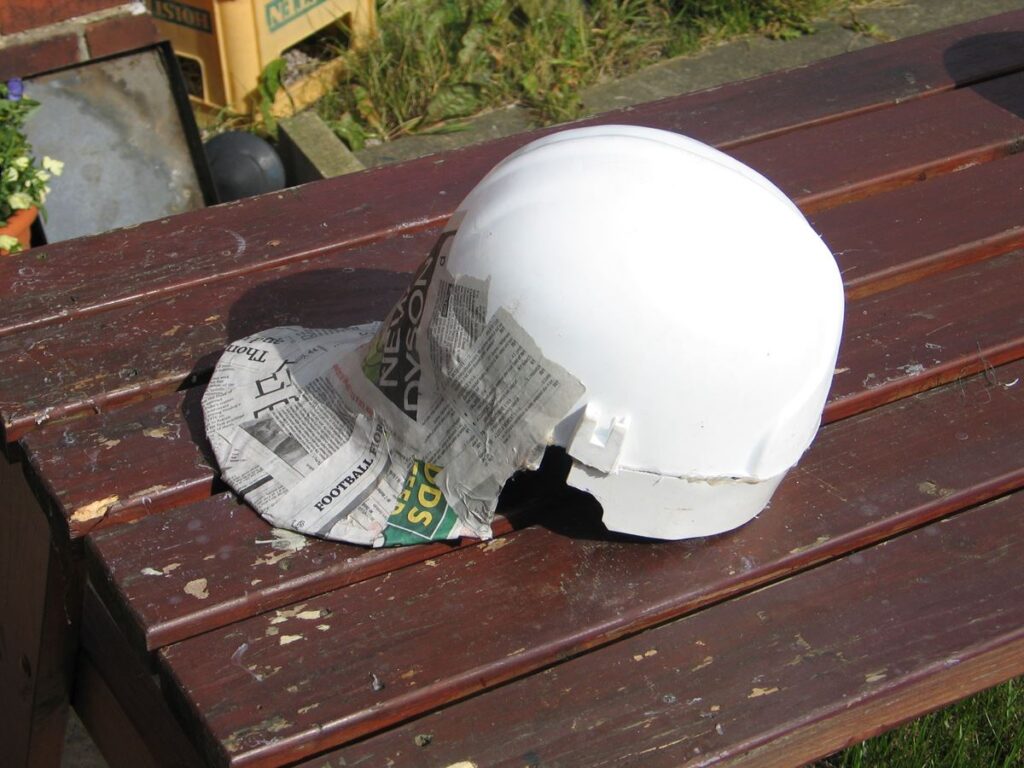
The helmets were another project within a project. Safety helmets cut and sanded down and extra bits of cardboard and plastic added.
There’s always so much more detail and time and effort in these projects than you’d expect. Here I am putting a papier-mâché coating over the plastic cheek plates and working on coating the helmets.
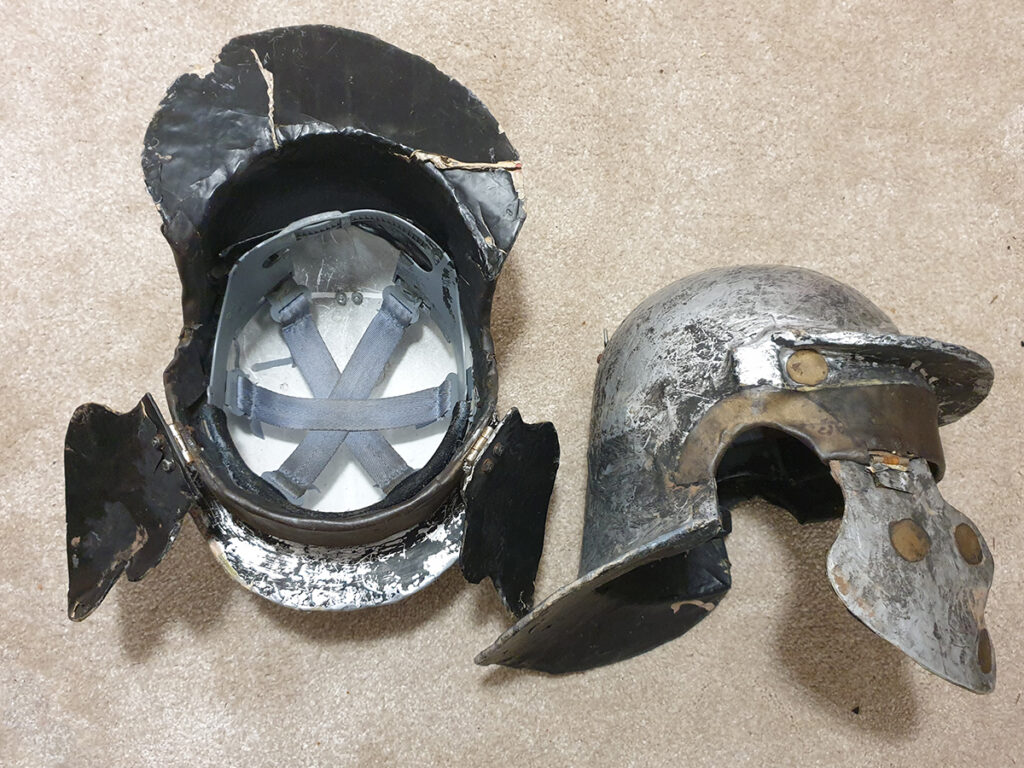
Inside and side view of the helmets. Brass “parts” were just metallic looking fabric type stuff.
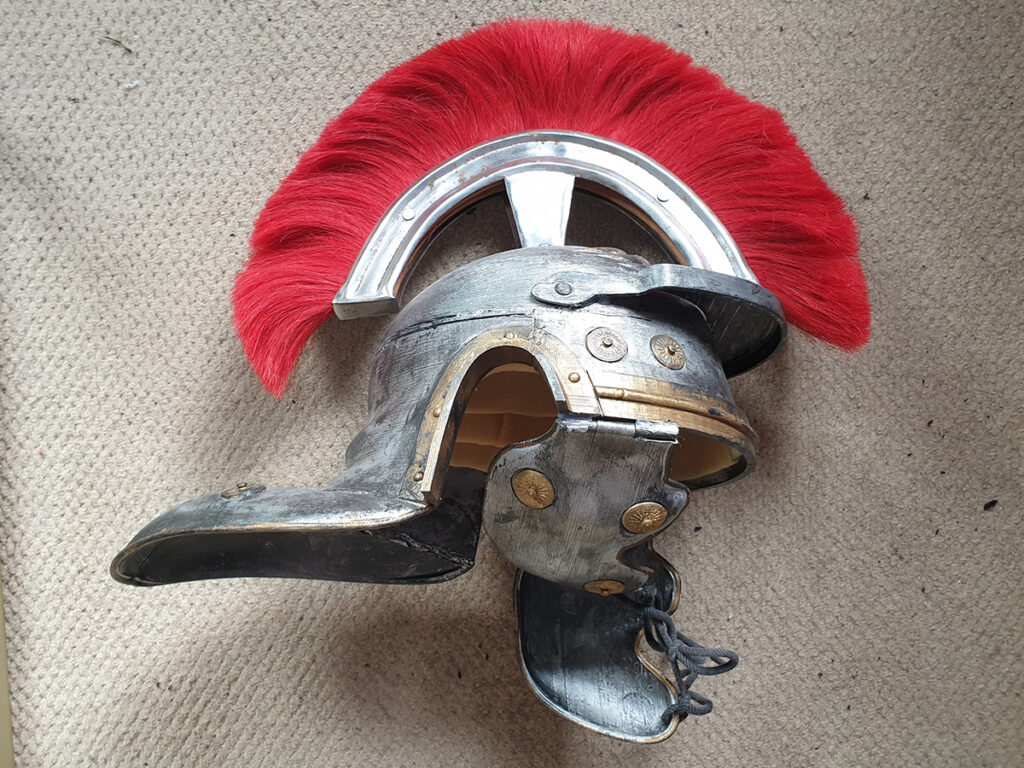
Side view of a new helmet which was made from downloaded 3D printed parts in 2018. I used the same horse-hair crest fitting that I’d bought for the original helmet.
Some foam padding inside as the helmet was smaller and more accurate than the ones that allowed a safety helmet inside.
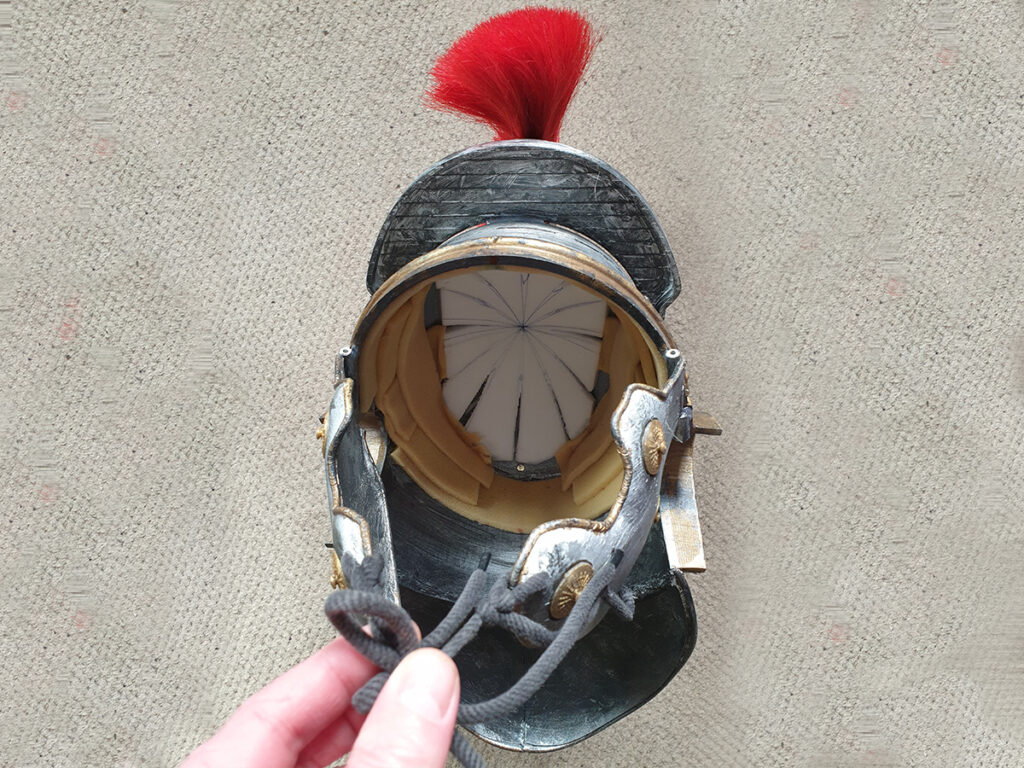
Top view with cheek plates opened out.
Six Cloaks and six tunics were required. Fortunately the patterns were quite basic. There was s till a lot of sewing to be done. I should have used a darker maroon fabric but I was quite taken with the bright red as it was very striking.
Front and rear of the original shields They were flat for convenience, time saving purposes and also because they could be made out of festival-friendly foam. One was left at Creamfields, but not by me.
When it came to 2018 and I wanted to make a betetr shield, I needed to use my oven extension to heat the plastic strips. The mosaic table had a suitable diameter for bending the softened plastic around.
I hadn’t planned ahead on my first go at making one of these and the corners weren’t rounded. I thought I’d deal with that later. It was going well though.
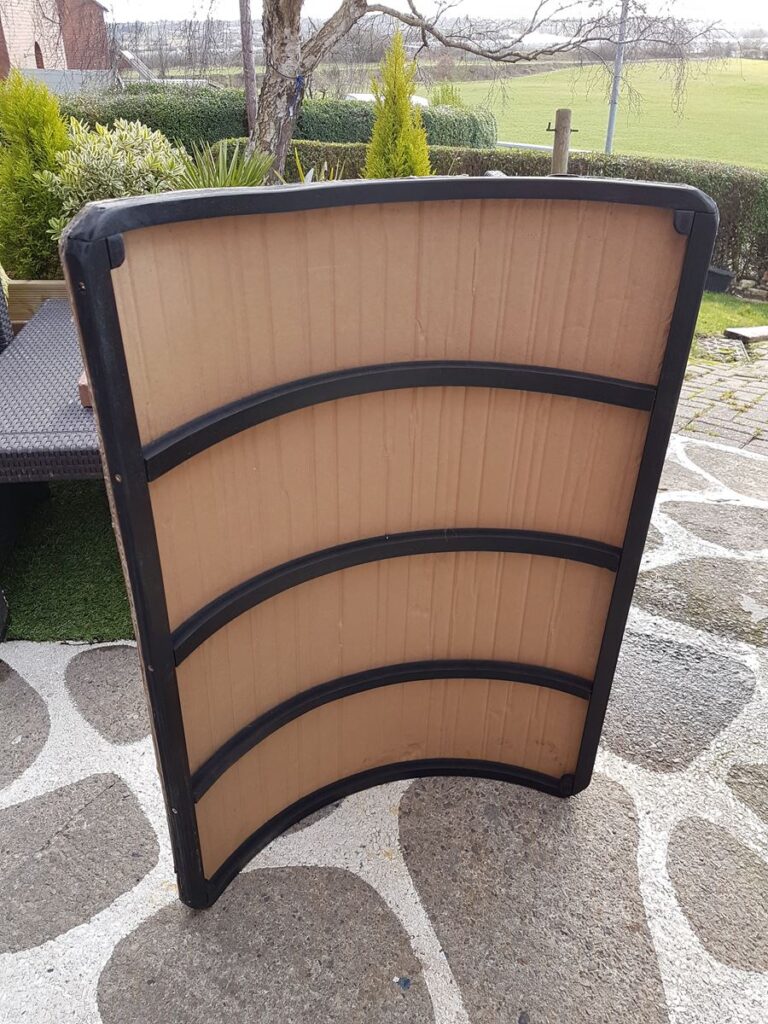
I added some inside corners so that the external ones could be rounded off. Some spare cardboard was fine for the skin of the shield but I did wonder about it’s longevity.
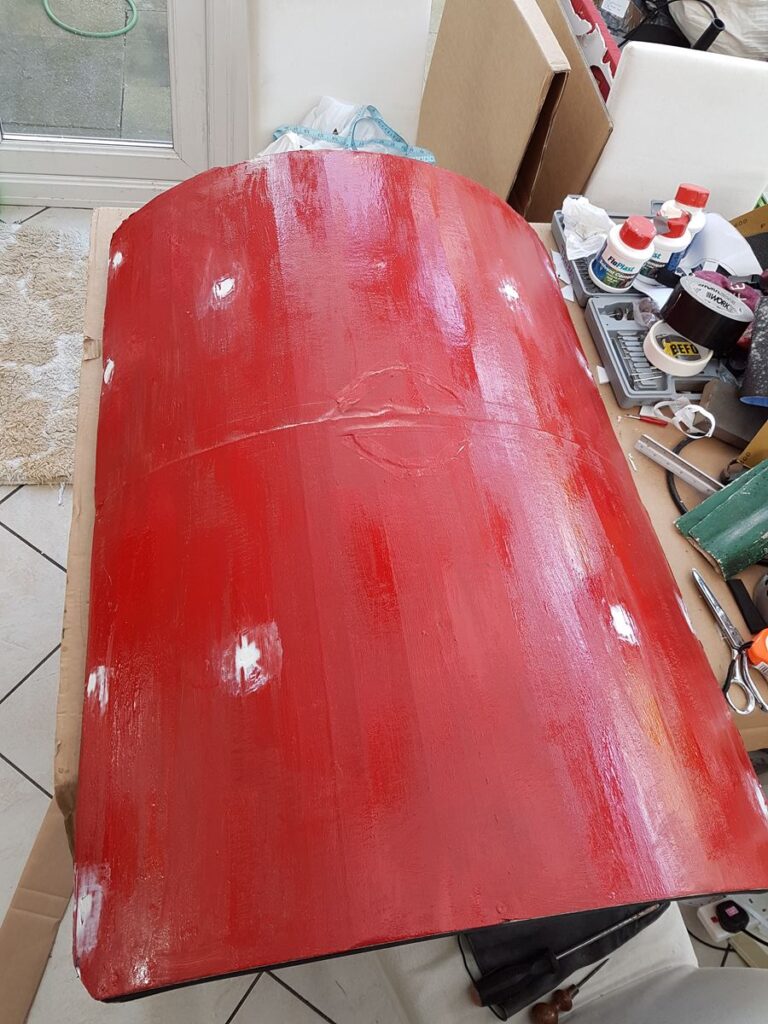
Screw were filled over and the should was painted. Not in the right order though. It needed a further coat anyway.
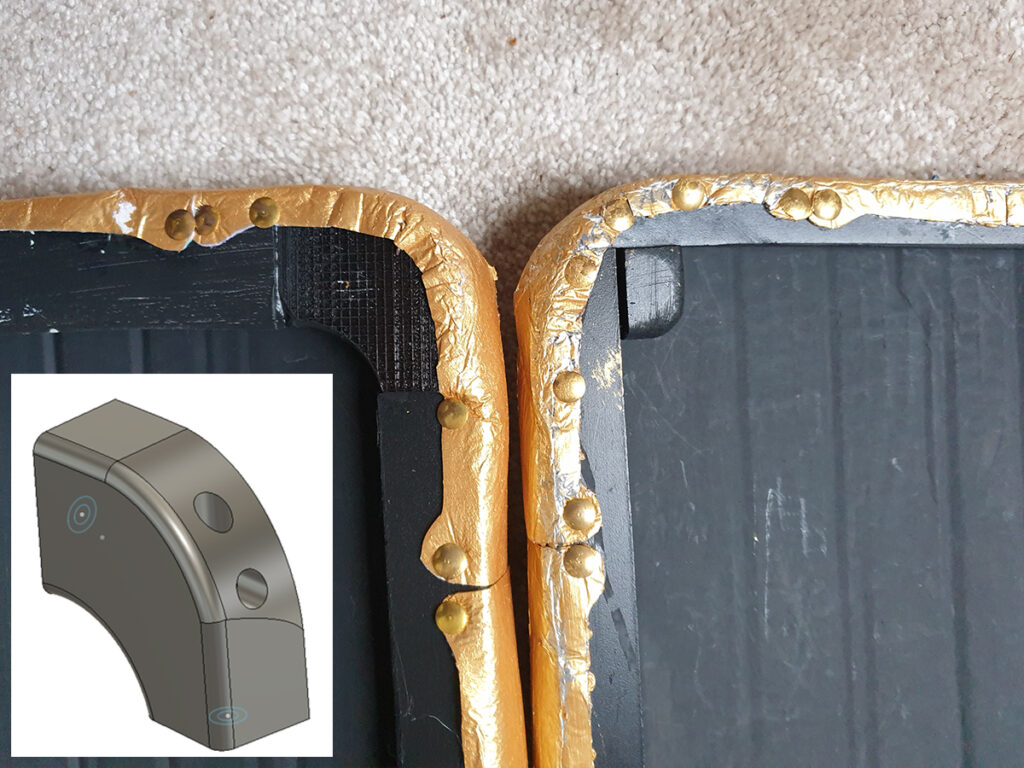
A further shield was made exactly a year later in 2019, with some improvements. I created and 3D printed some corners that would make things easier, simpler and more uniform. The “brass” trim was just silver radiator foam with some gold paint. This was glued and pinned on. It looks kind of cack, but all of it does to some extent. It also had to be demonstrably not dangerous like a real shield could be.
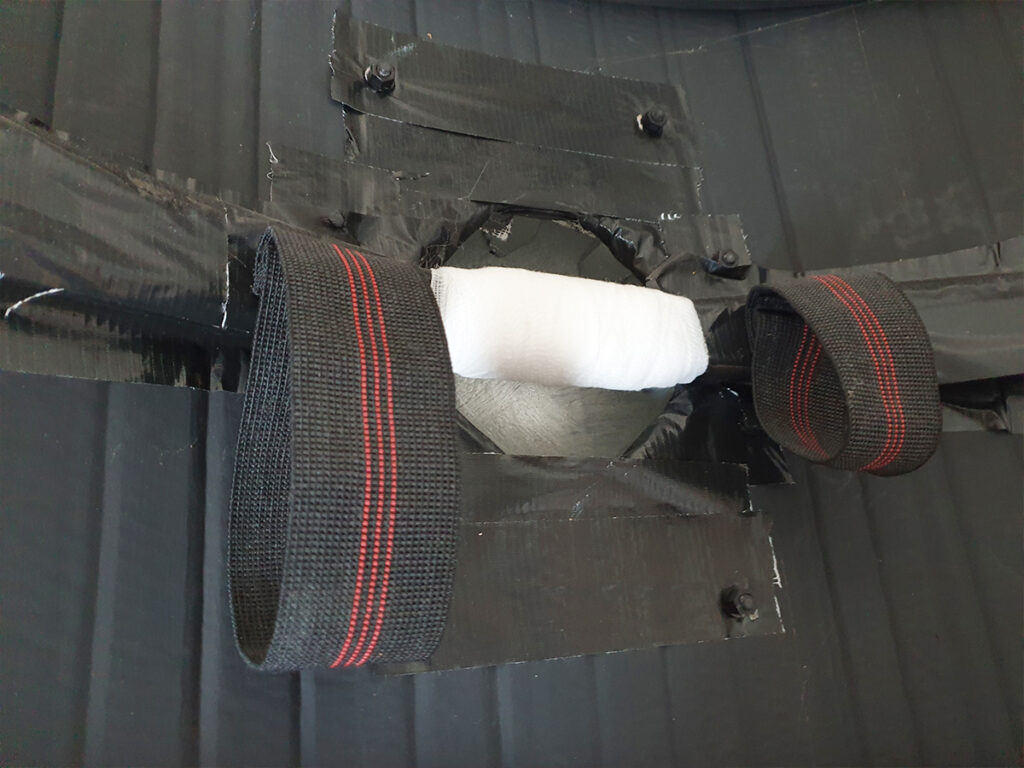
The central bar had bandages wrapped around the handle section in the boss recess.
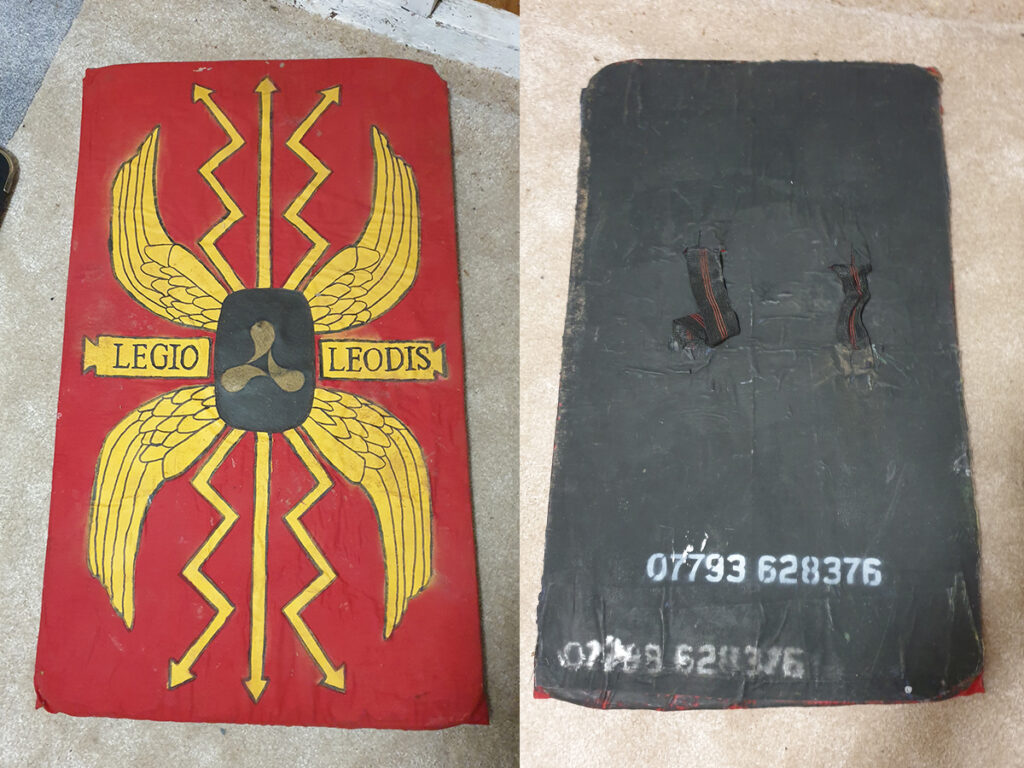
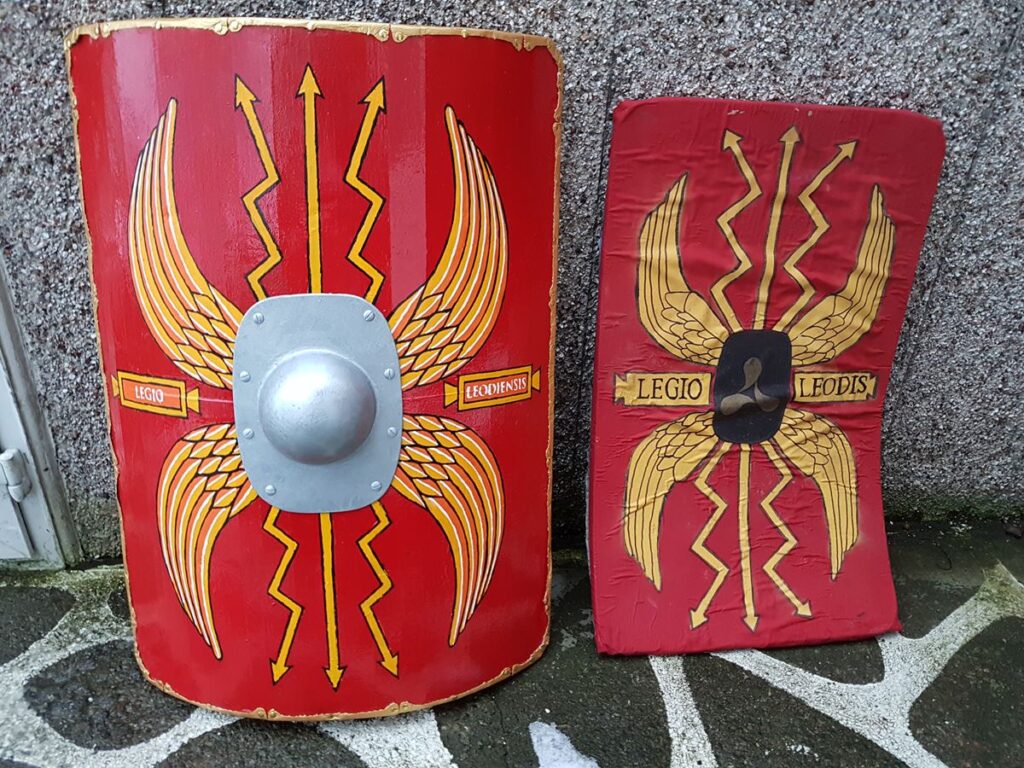
The 2019 shield (right) had graphics printed on paper that were glued to the shield. They were far easier to create and apply, but the colours were less vibrant and it also looked too good/sharp. I painted some bits back in to give some of the hand-crafted look back.
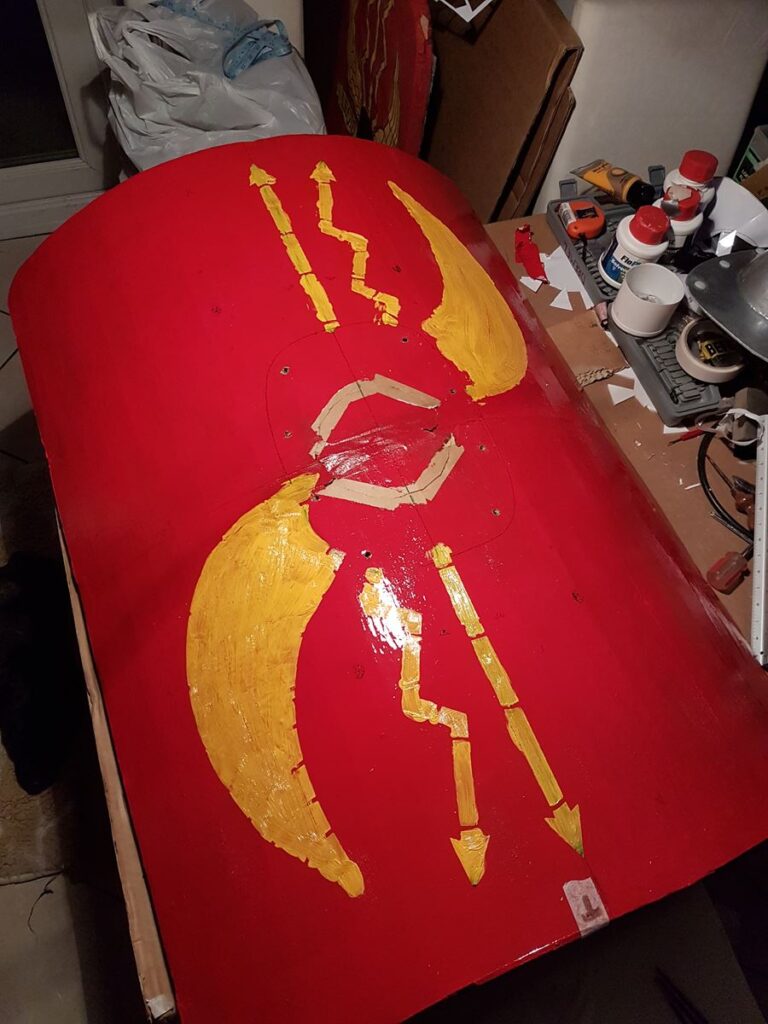
The 2018 shield had hand painted graphics and I made stencils for this which was a still a task itself. These were mostly machine cut though, fortunately.
Application of the stencil painting begins. The boss centre has been taped back in temporarily to make things easier to line up and paint.
Even with stencils, it can go a bit wrong but it all got touched up to a reasonable degree.
The front plate section and boss were made from some Foamex and half a ballcock. I love finding solutions like this.
A comparison of the new 2018 shield and the 2008 festival one. A startling difference.
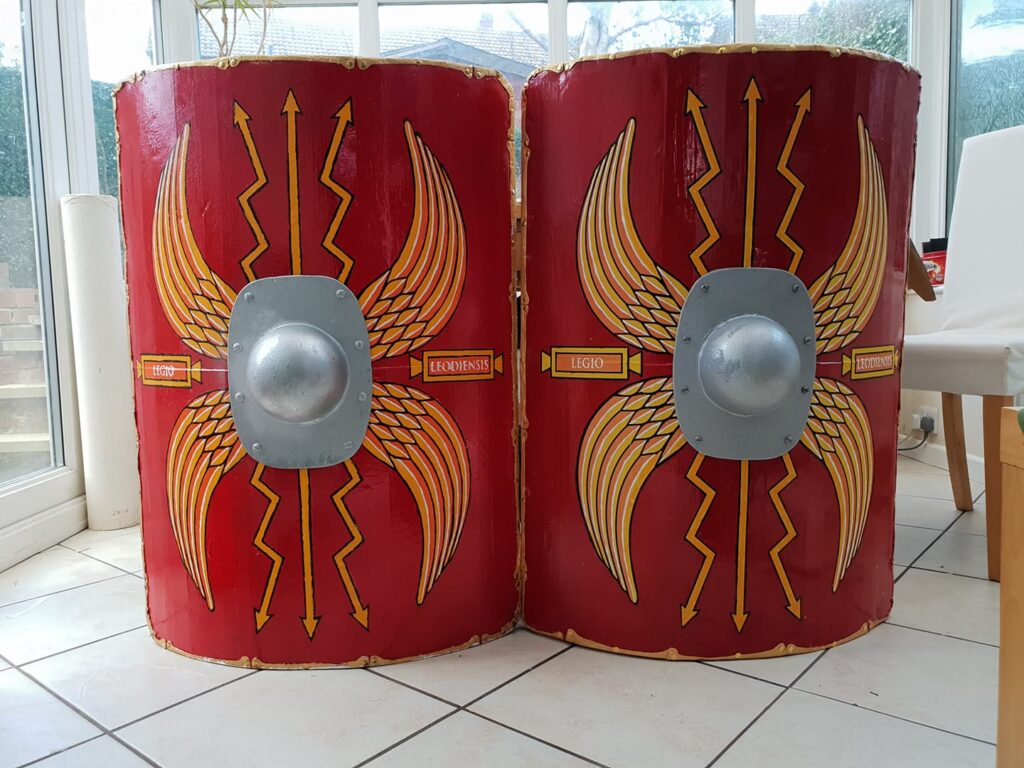
the 2018 and 2019 shields. Critically, this was UTTERLY FUTILE as no-one else was ever going to be going out with me to require a second shield.
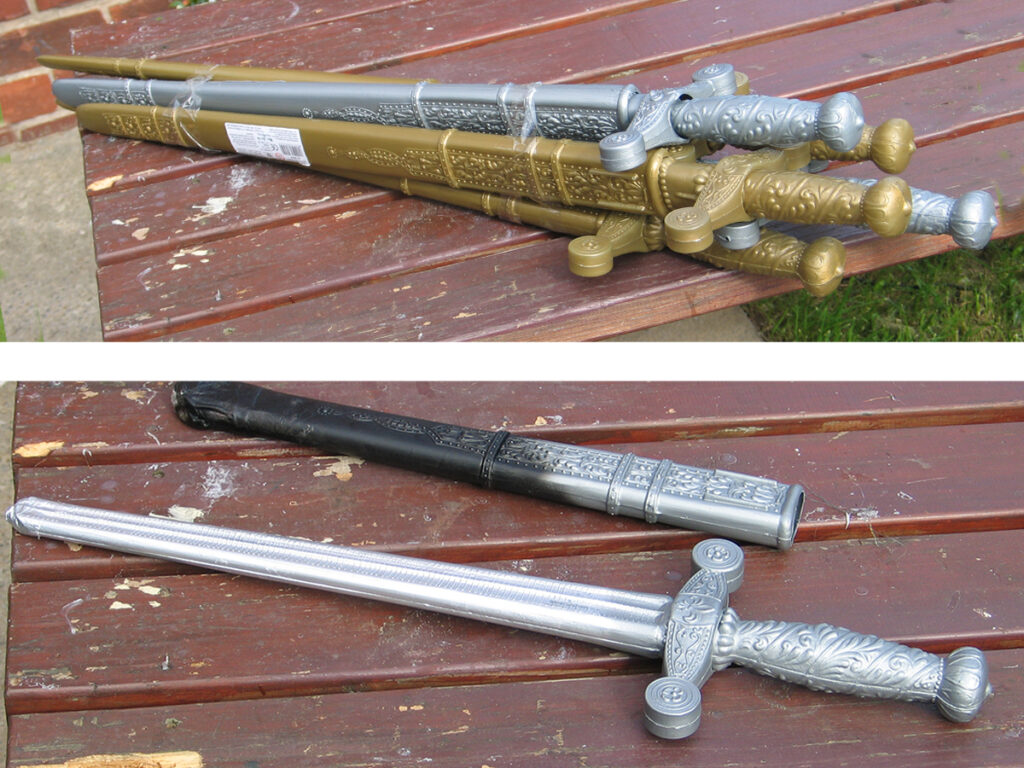
There wasn’t enough time to make fresh weapons in 2008 so some wholly inaccurate cheap toys were cut down, adapted and painted.
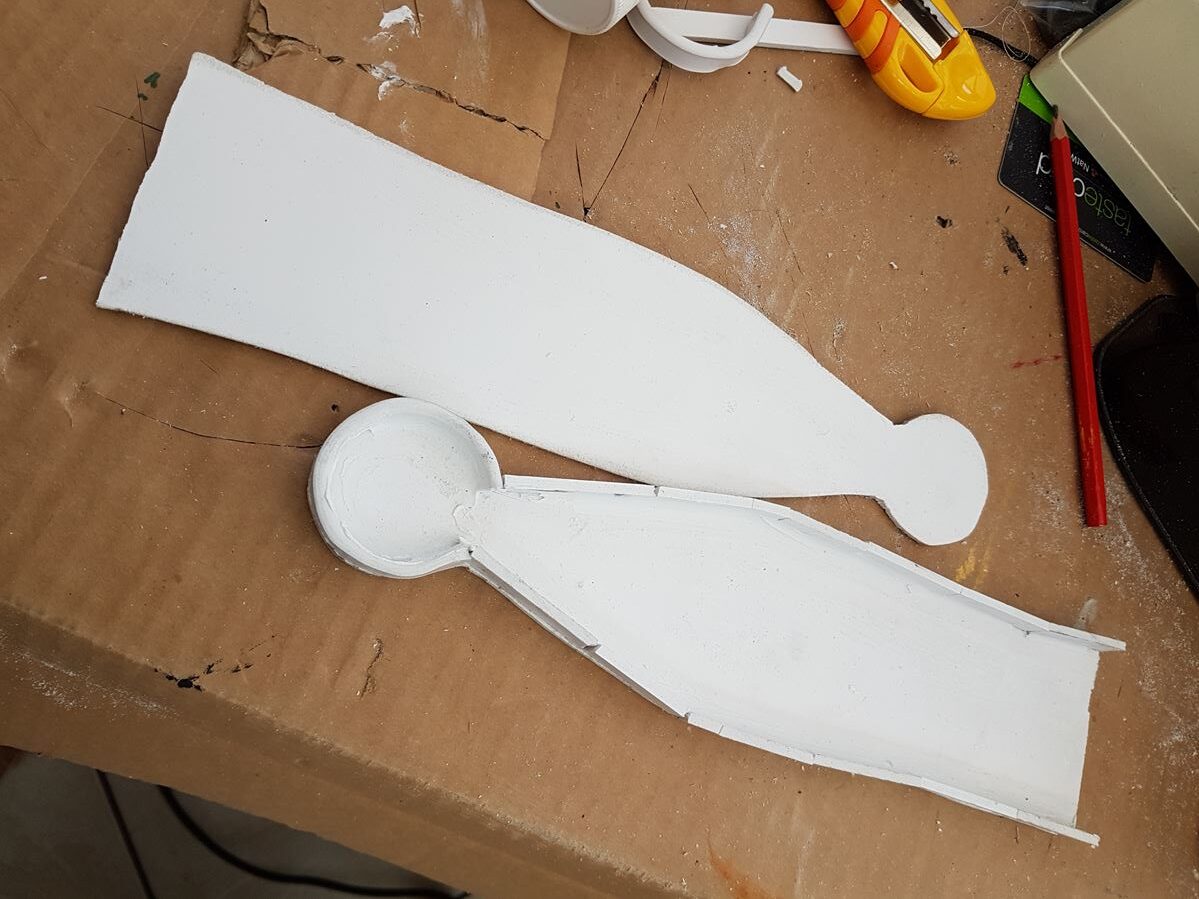
In 2010, some new gladii (swords).and sheaths were made using different methods. The wood block was used to form strips of plastic around for the sheath edges.
All kinds of parts for the new weapons. Made from plumbing pipe, wood, ABS plastic and PVC guttering. Lots of cutting, shaping, sanding and drilling required for the hilt parts.
Finished Gladius, sheath and balteus with fittings.
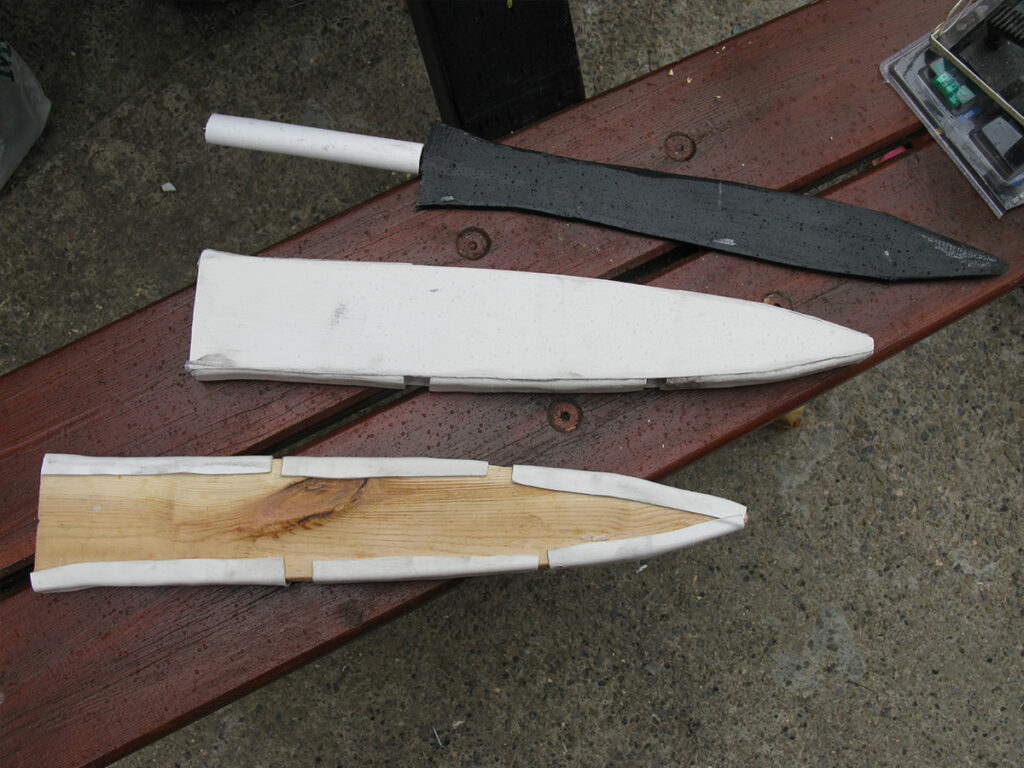
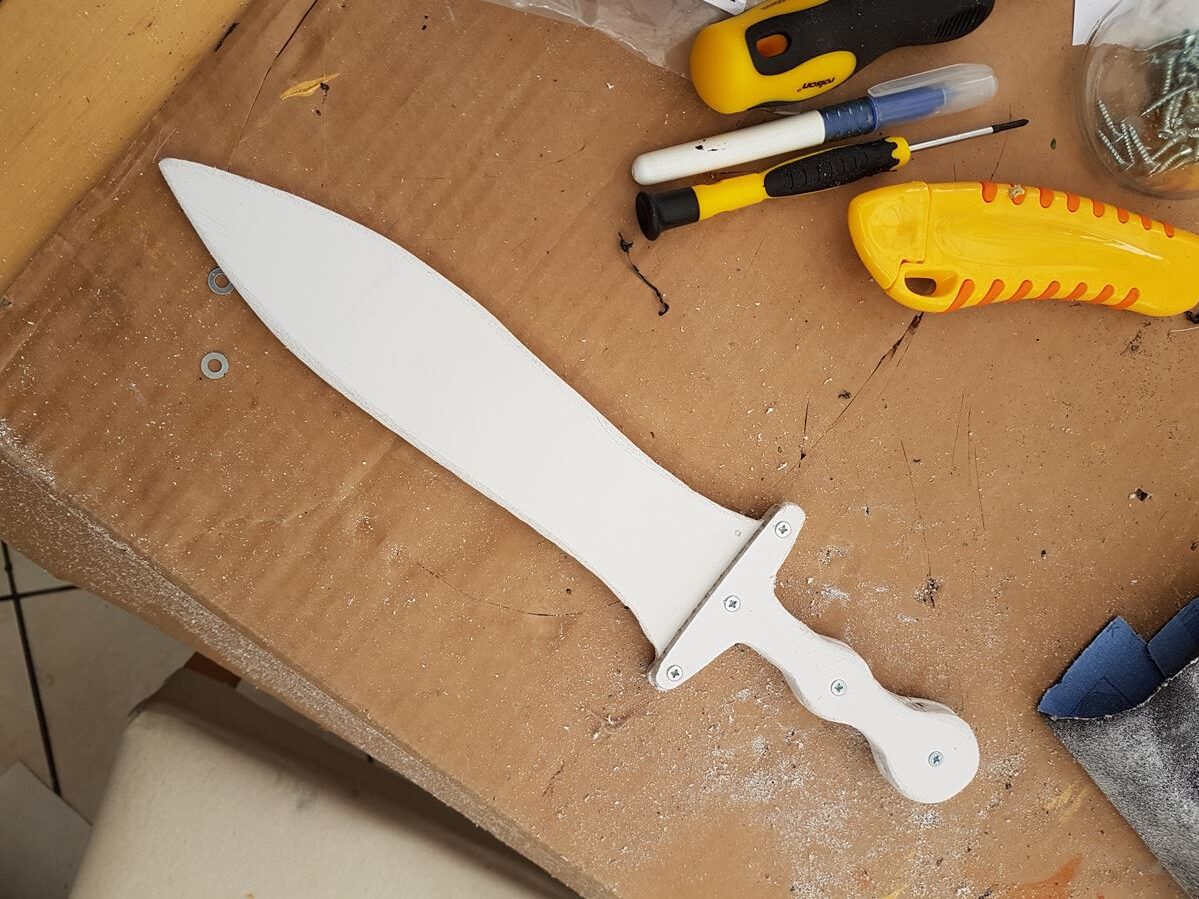
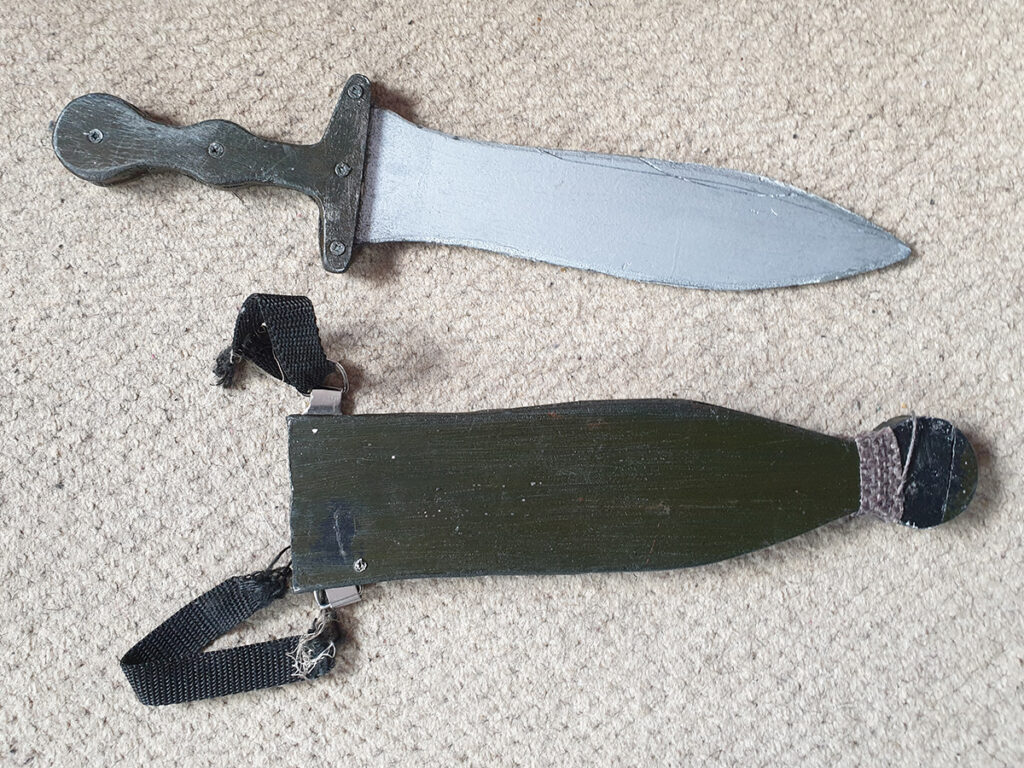
I eventually decided that I should have a further weapon , as the legionnaires did. A dagger known as a Pugio. It was all made out of some Foamex plastic that I got out of a Plastic Wholesalers skip.
The whole pugio build and paint was started and completed in one morning and I was quite happy with it.
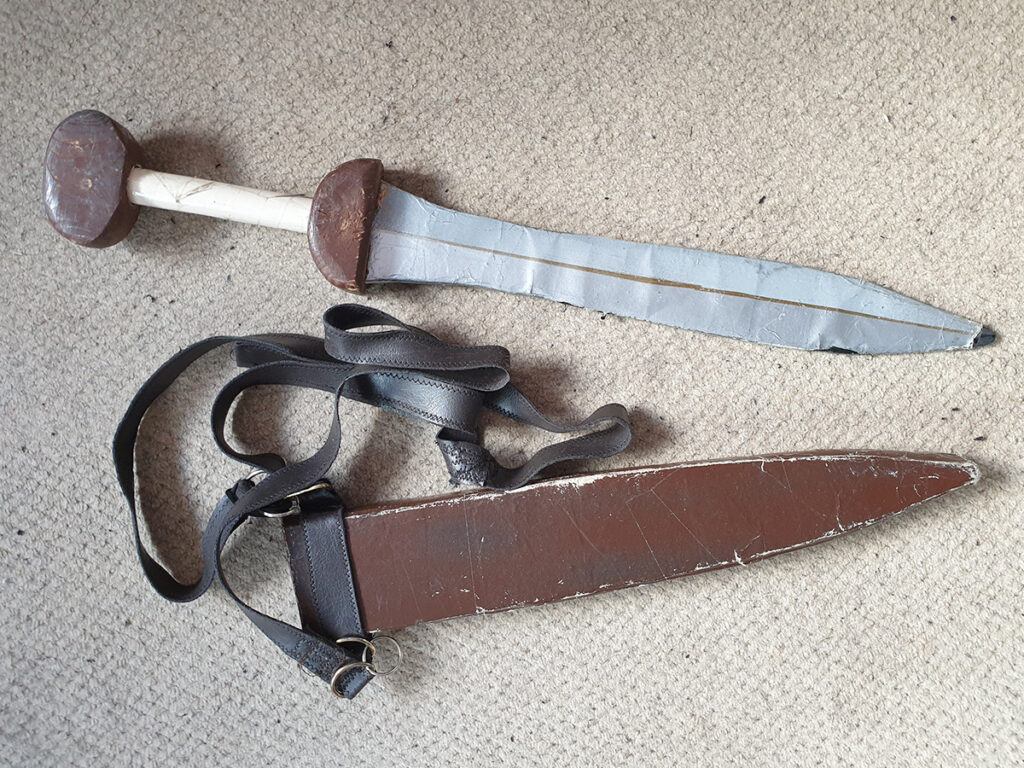
Completed Pugio and Scabbard with belt fittings.
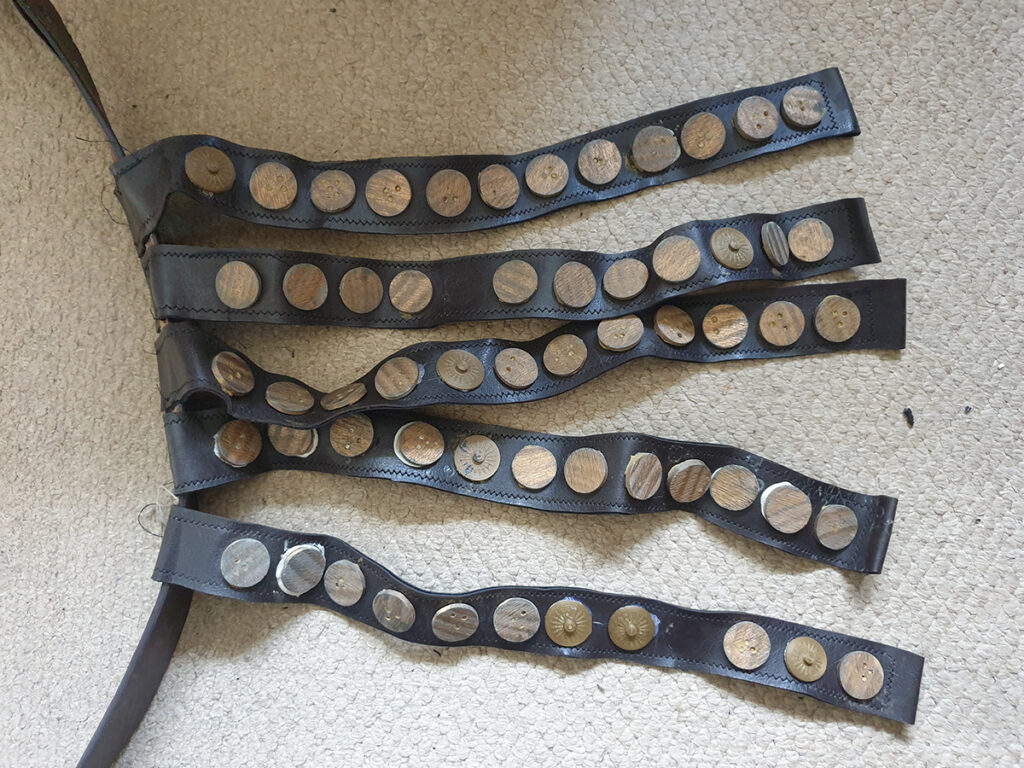
The Cingulum (belt) with bulla (stud) decorations. The majority of these are original bits of sliced broom handle that were glued onto the faux-leather baltea strips from 2008. Some replacement “studs” were 3D printed.
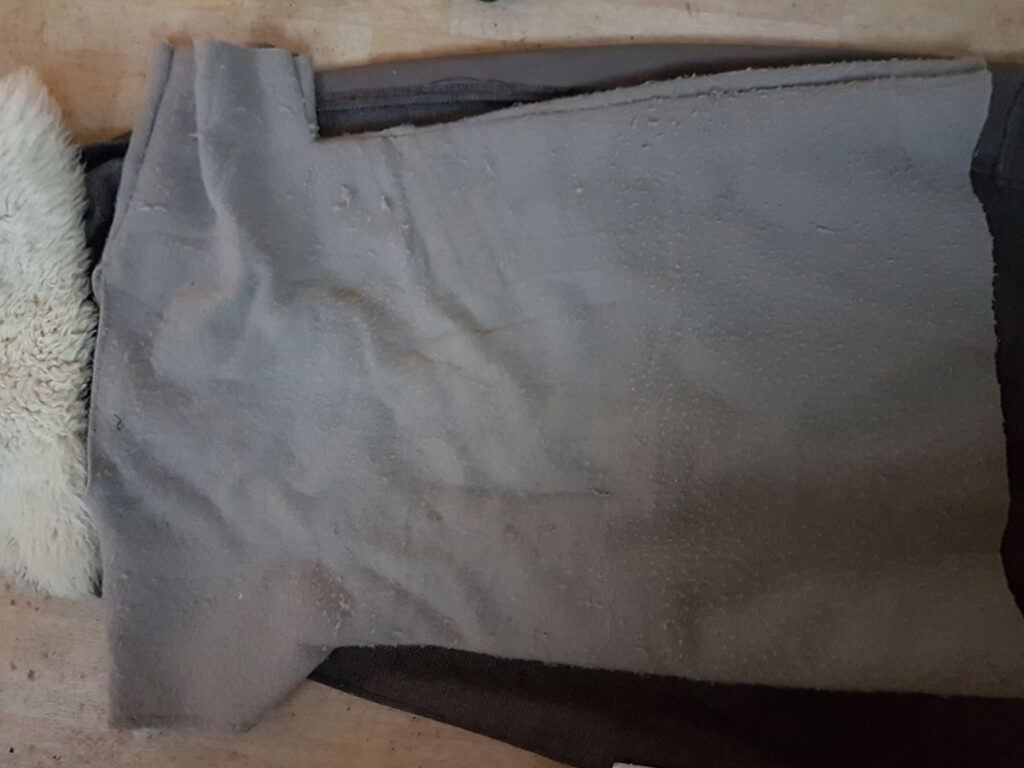
Until 2018, the Bracers and Greaves (arm and shin guards) were home made plan faux-leather with Velcro patches (inset). I bought these decorative studded ones though. though.
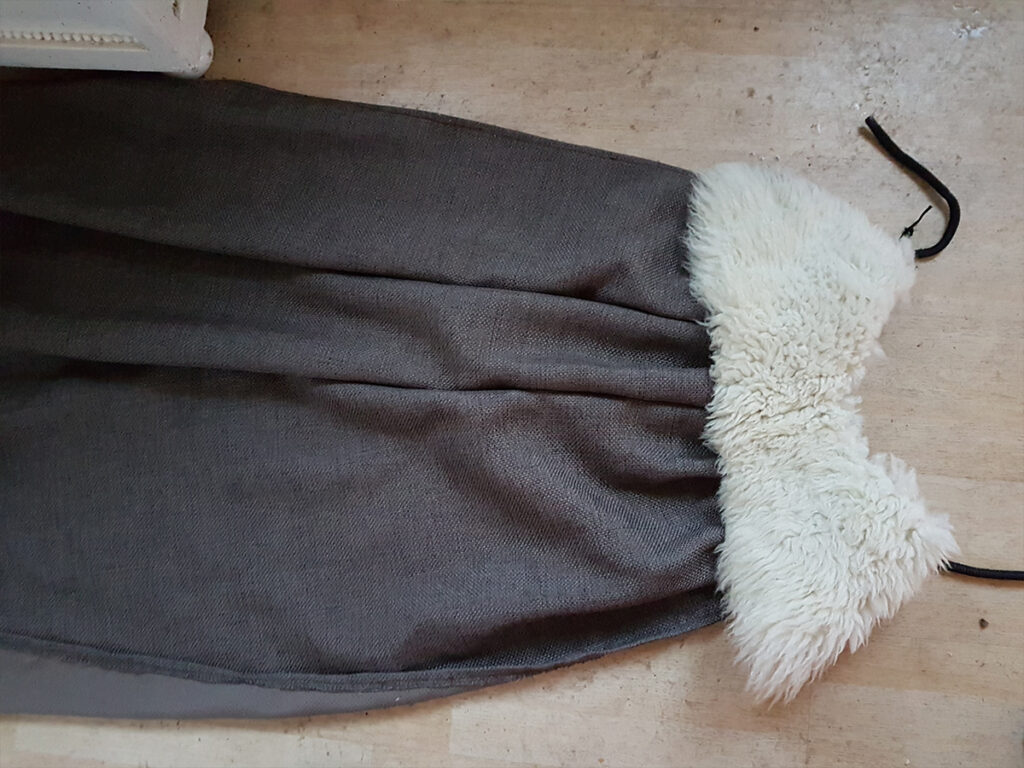
Winter boots were quite easy to rustle up with some sand bags, faux-fur and string.
Winter Tunica, but with some tapering and short arms as opposed to the plain rectangle with holes used for the summer version.
A winter cloak with part of a real sheepskin rug used for a collar.
I had to make some trousers from scratch because modern trousers wouldn’t have had a good texture and have all kinds of smart seams. I used the button part of the waistline from some jeans though.
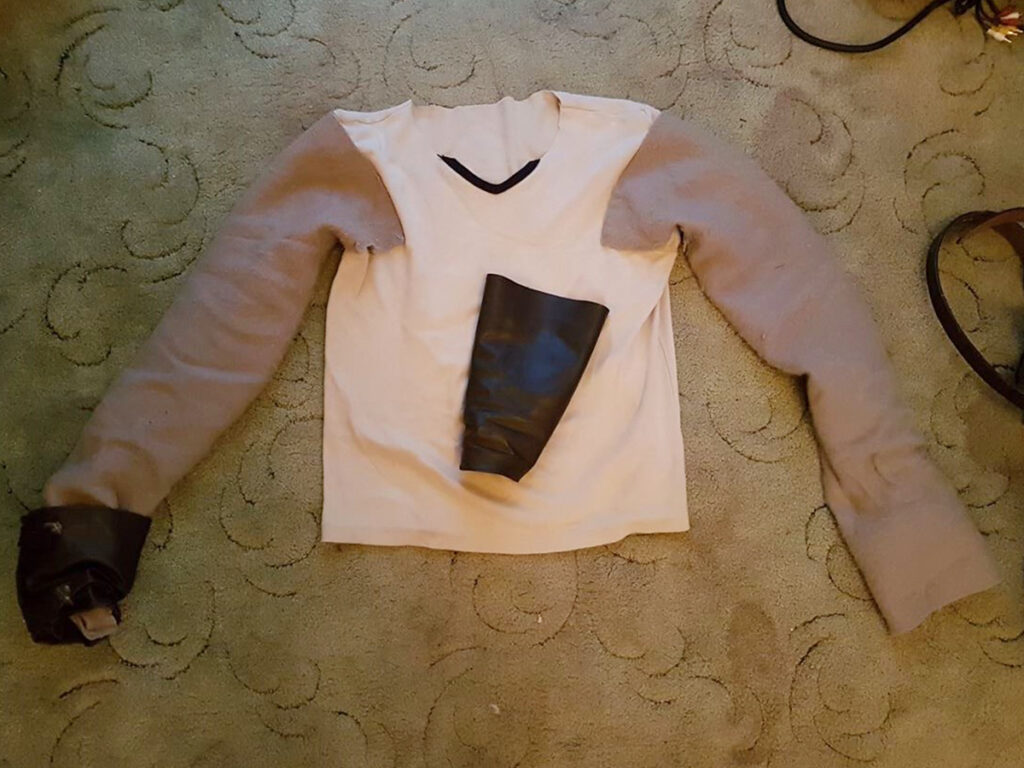
A winter top, but only the very long arms (to allow for fold back cuffs) were made of the thick material. The rest would be covered by the tunica but it does make this garment look like a terrible effort. Which it was really.
Romani ite domum
Some more in-use photos
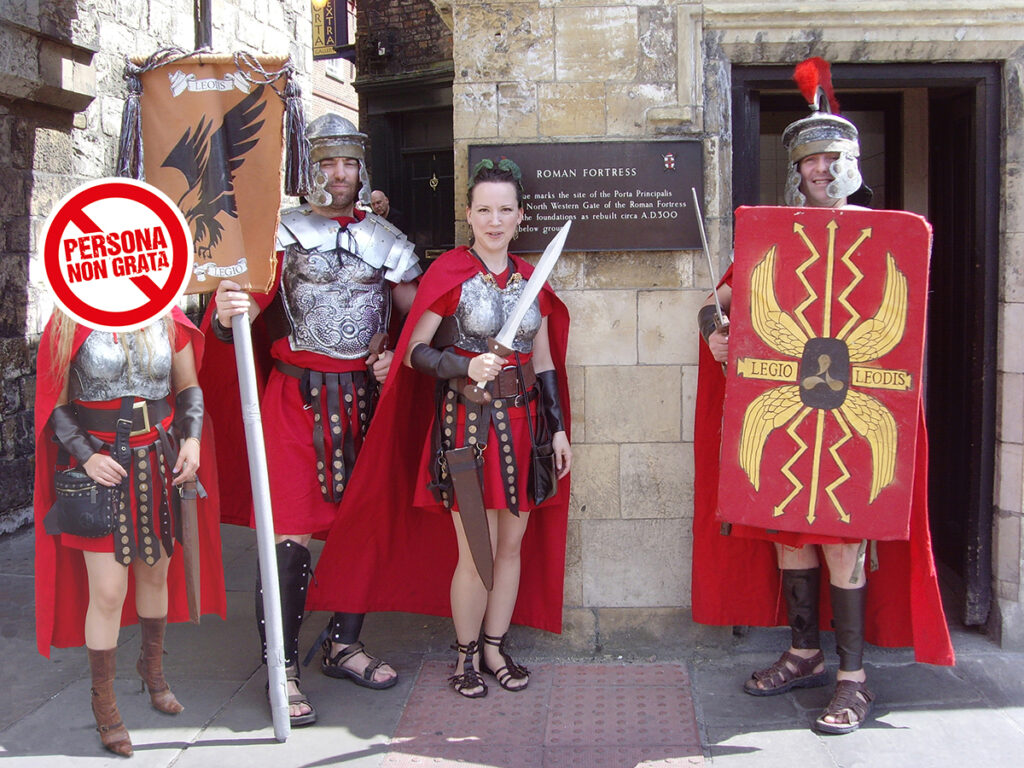
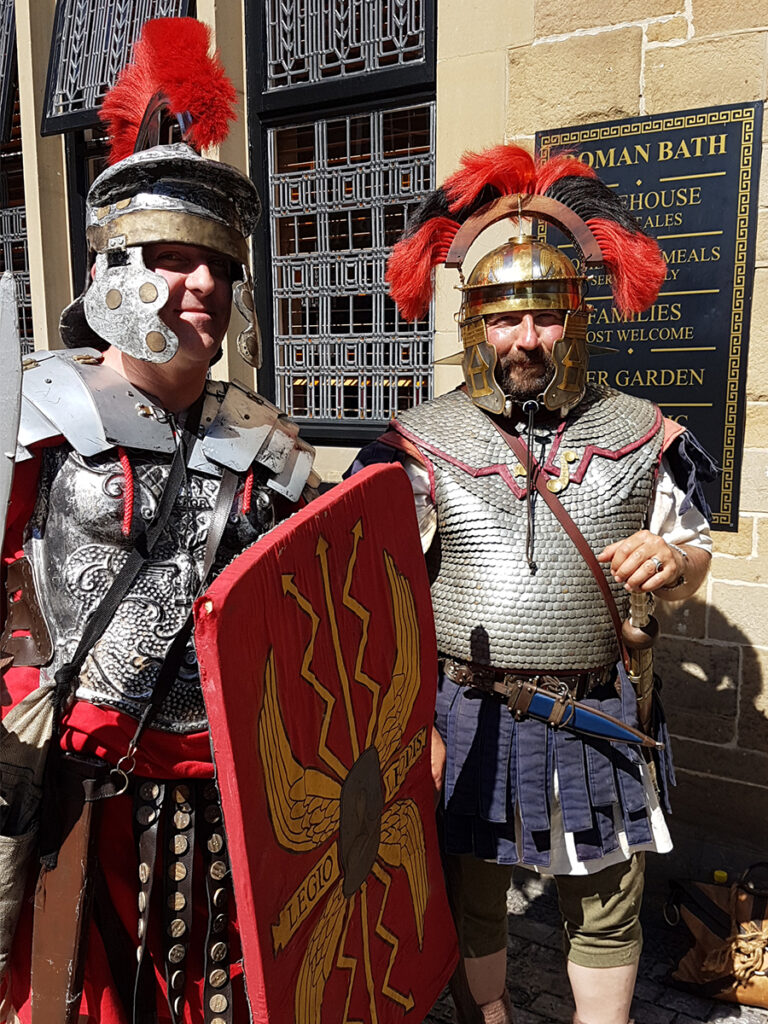
Photo with a much better Roman who works at the Roman Bath museum beneath the pub of the same name in York City Centre.
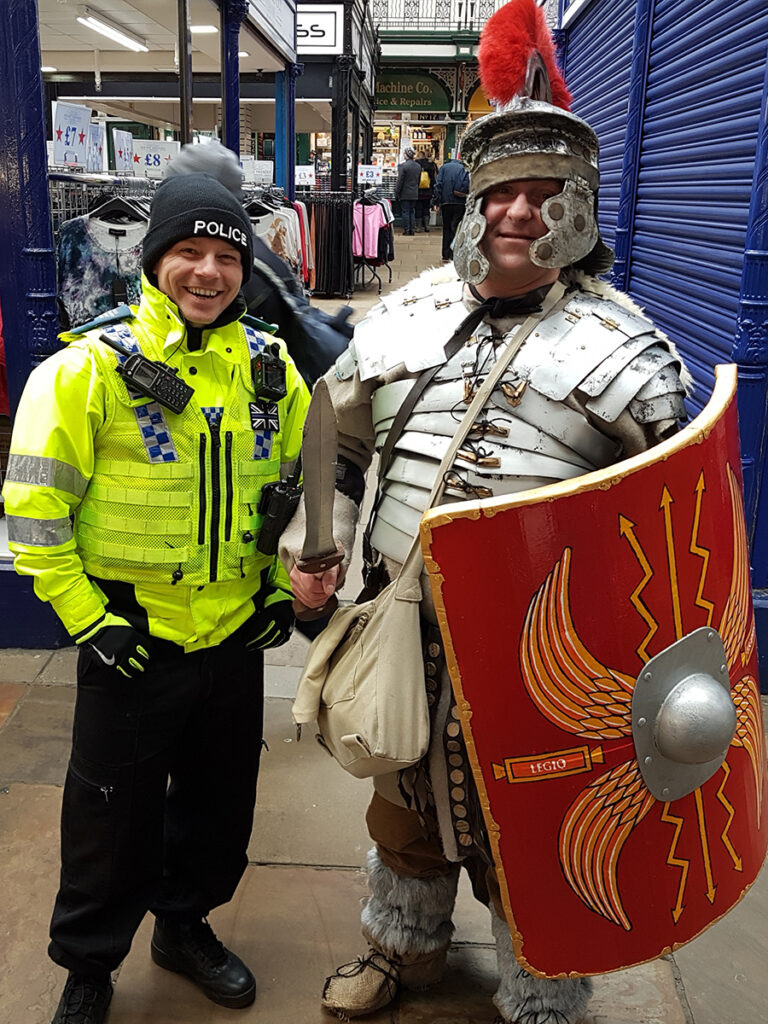
Normal photo with the local Prefect, I mean Police.
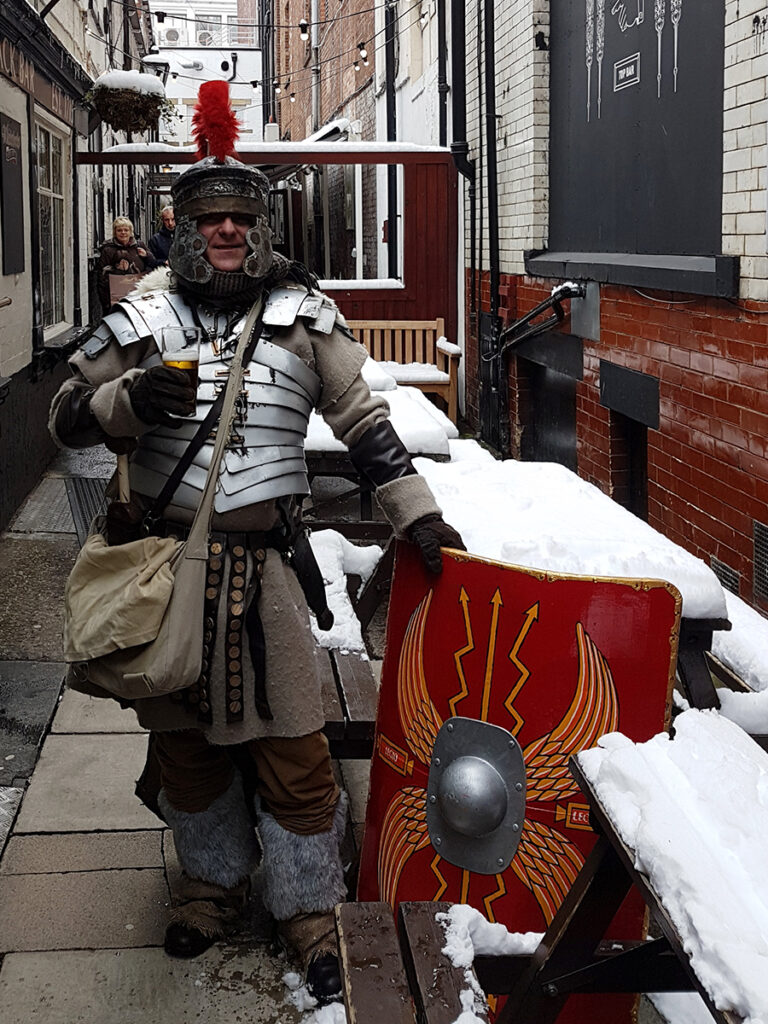
A cold winter pint with the snow at Whitelocks in Leeds.