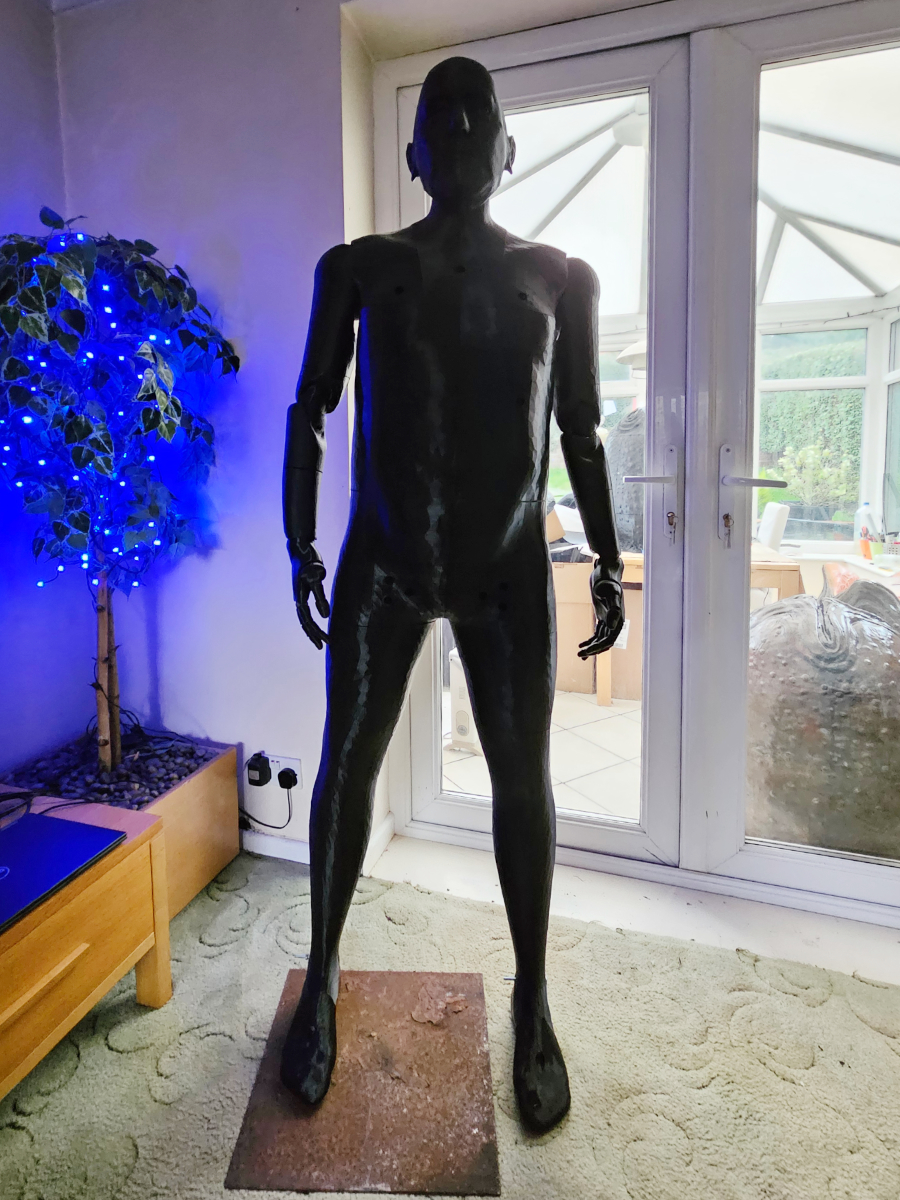
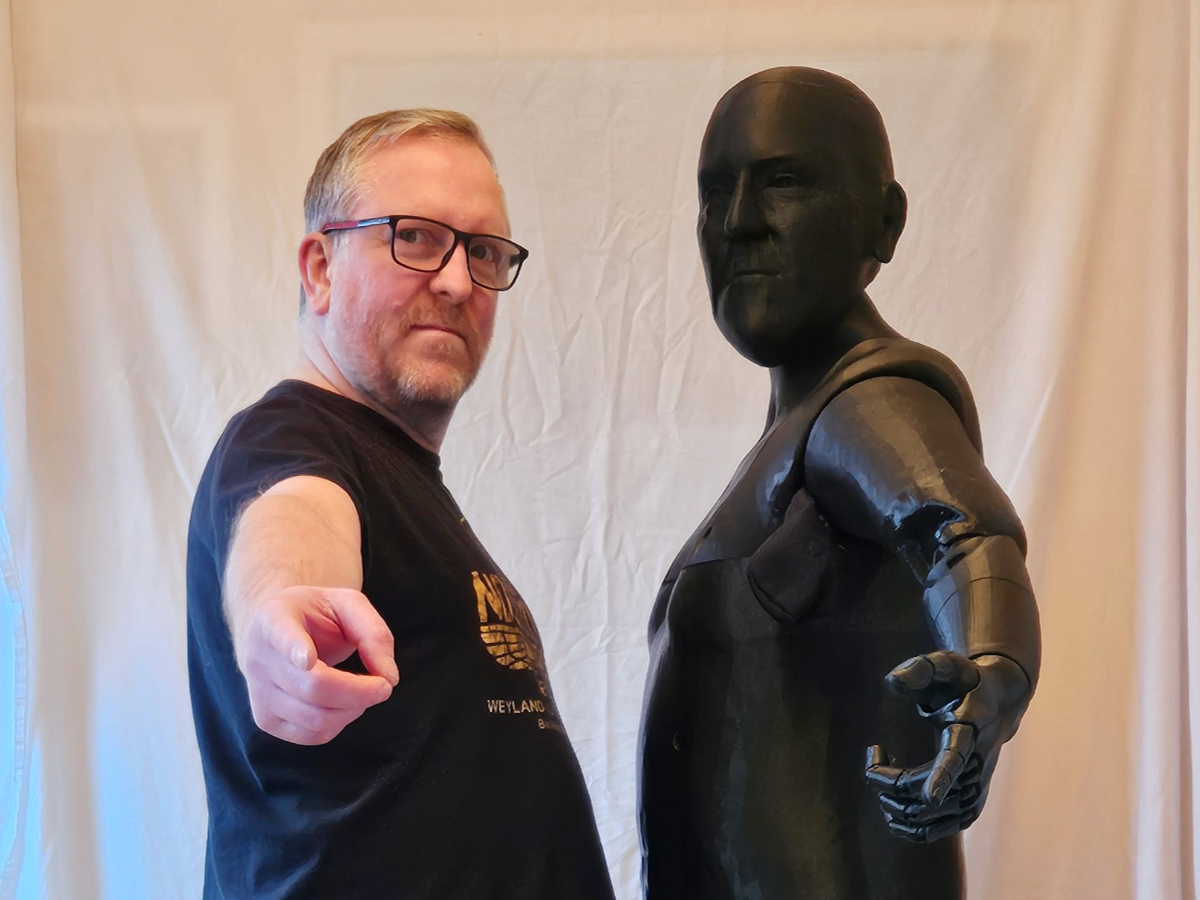
Me Mannequin

Me as a mannequin

What

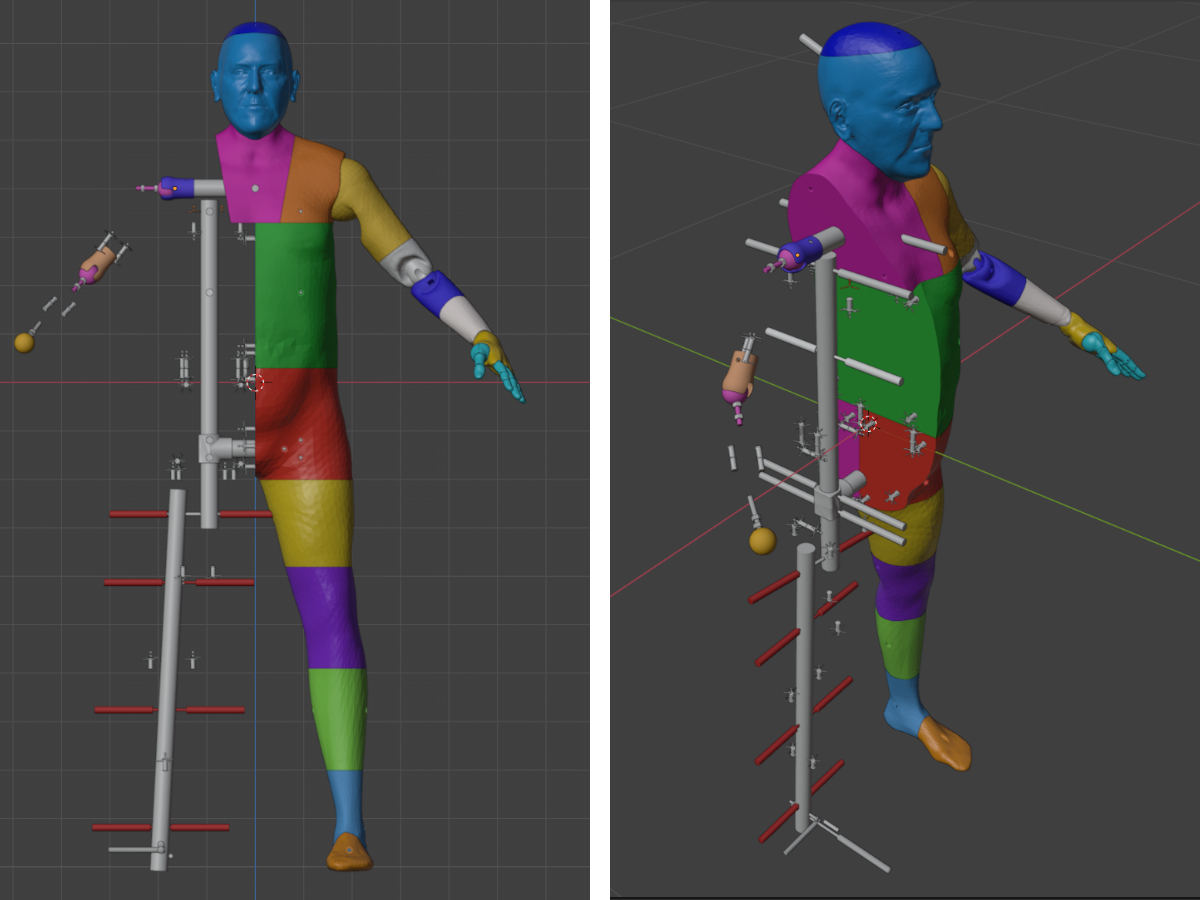
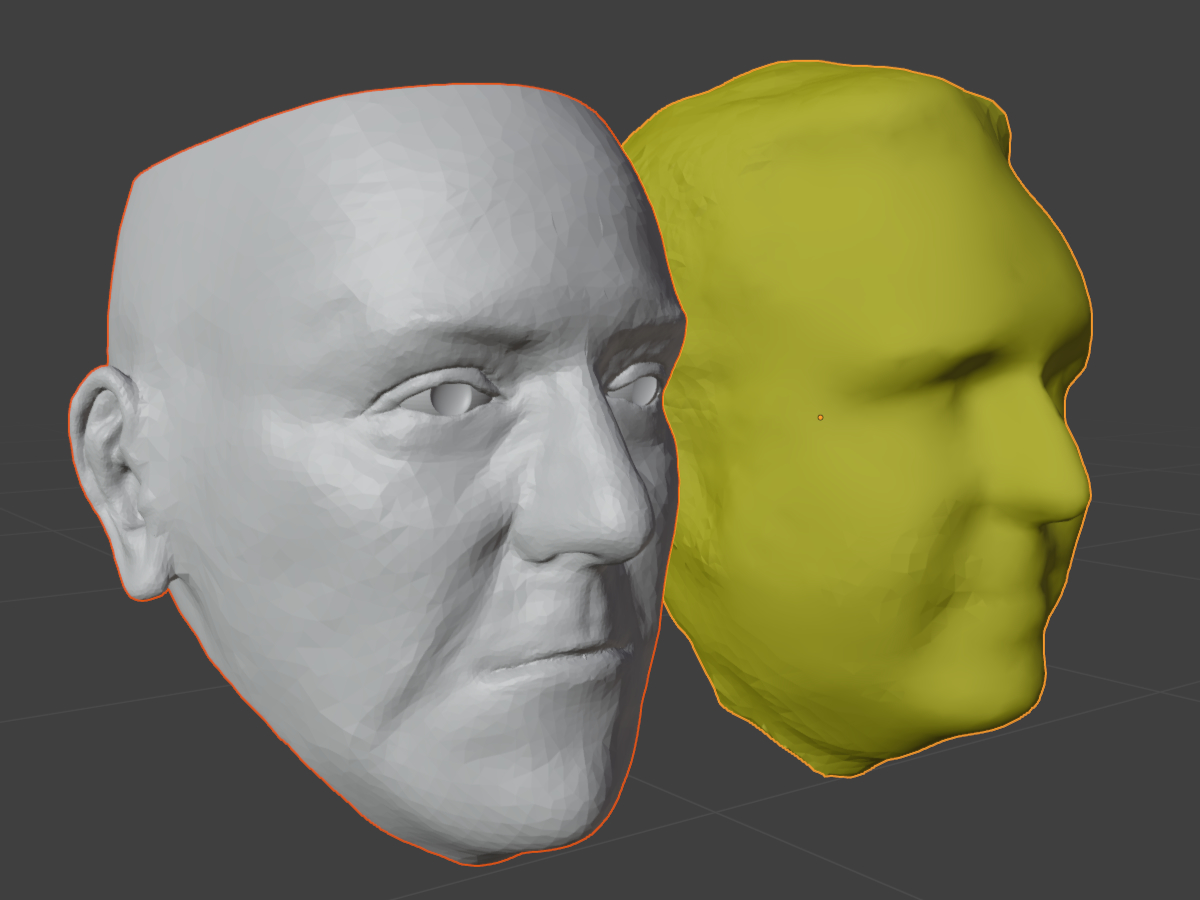
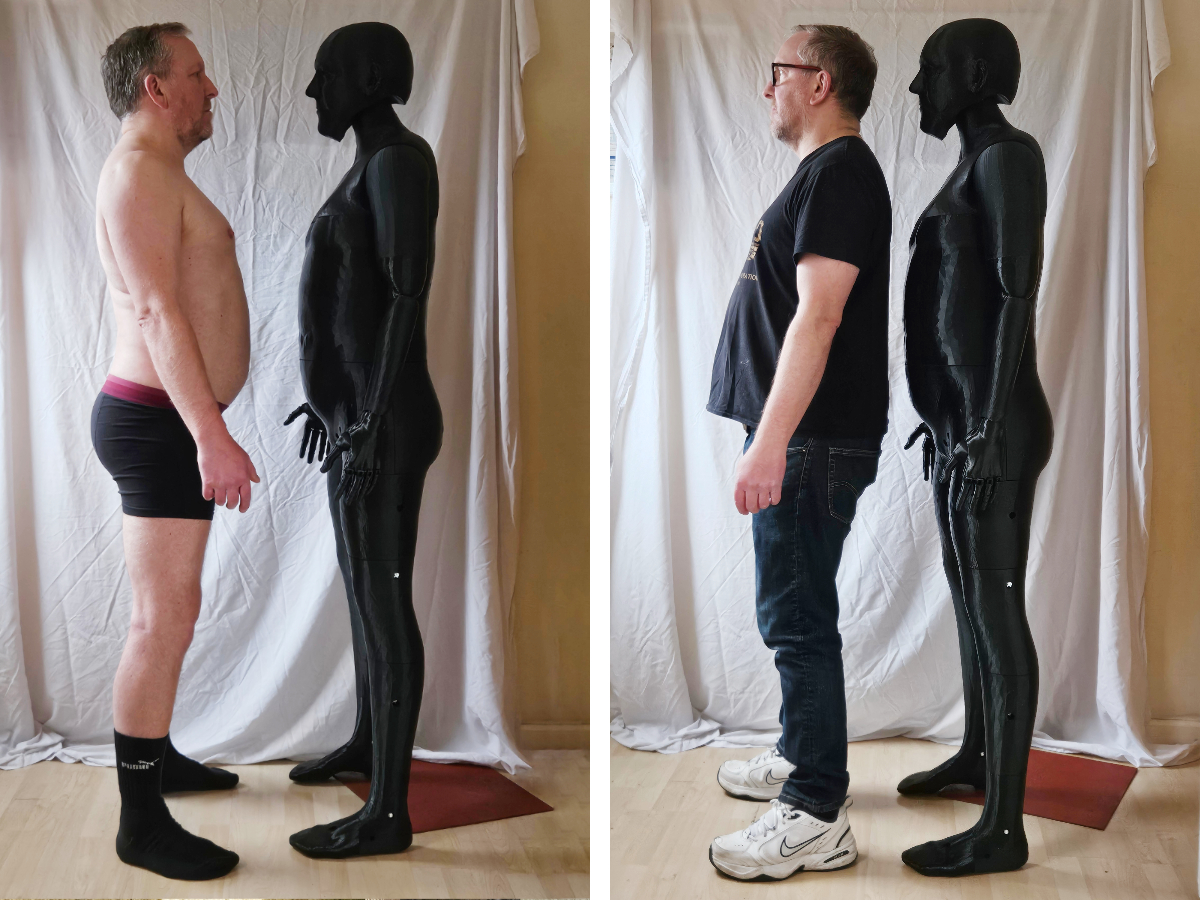
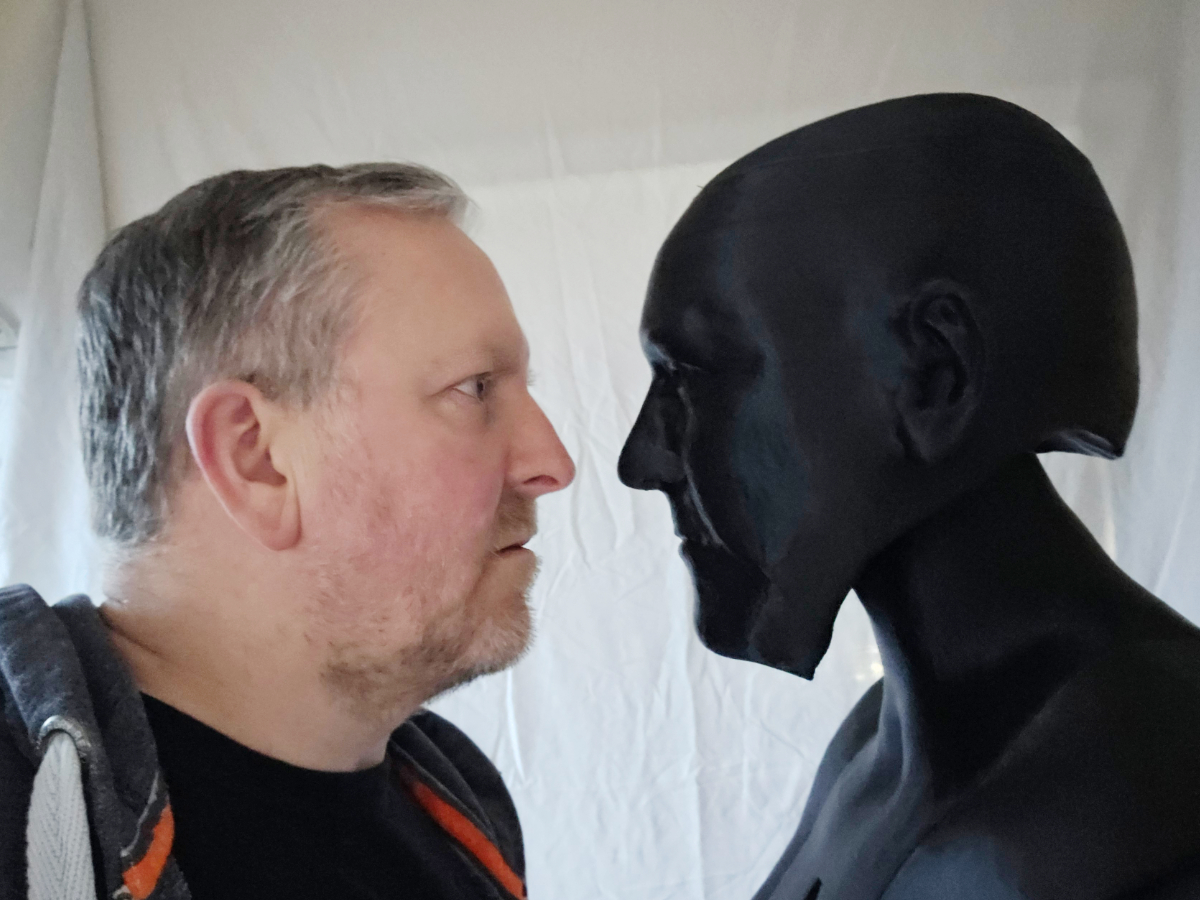
A 3D printed full size replica of a human figure with my approximate dimensions and likeness. Also featuring jointed arms, neck and hands.

Why

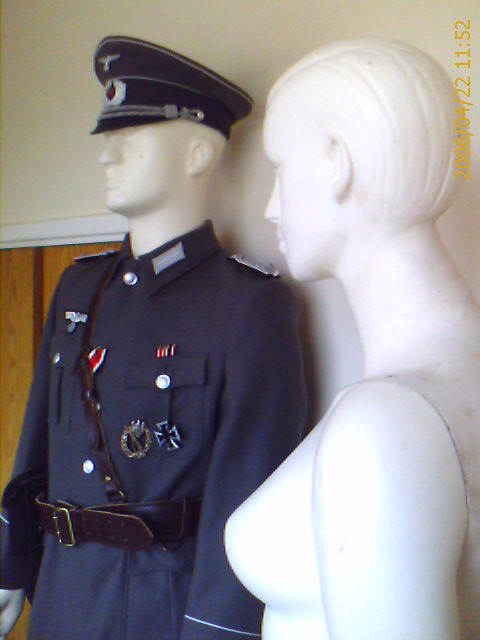
I already have a tall mannequin called “George” but I no-longer have his partner “Mildred”.
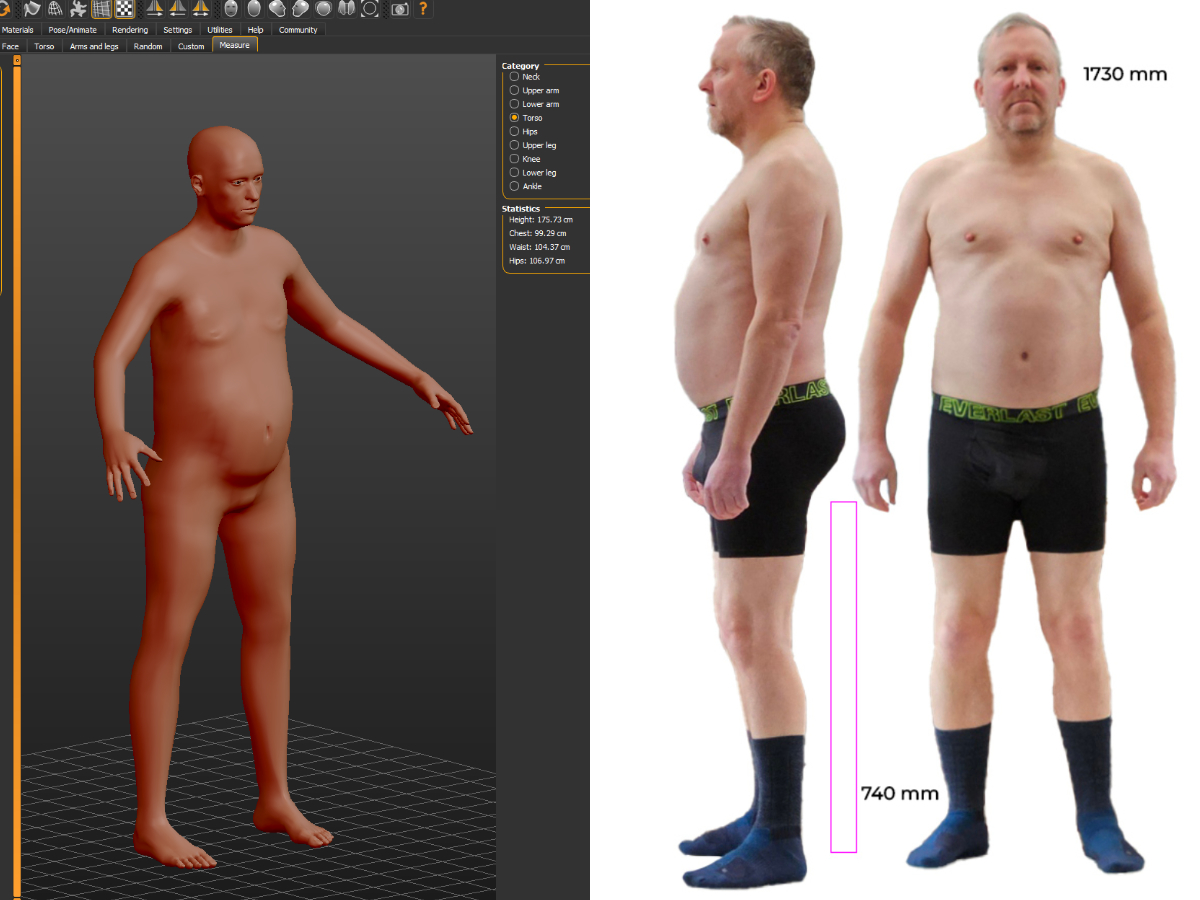
George is much taller and more muscular than me so I thought it would be interesting and even potentially useful to have something more my size. I also thought that some of the parts and processes from making my doppelgänger might be useful for other projects.

Other than that, I actually have bugger-all use for it. And it’s not something you’d want to look at or put on display either. So it’s all been strangely pointless in a way.

When

January 2026

Mannequins George & Mildred

Development & Progress

I had to get some measurements of myself to put them into software called Make Human. That only gave an approximation to use as a base model (left). So, I also took reference photos of myself so I could put them into 3D software Blender. I could then make the model more like me.
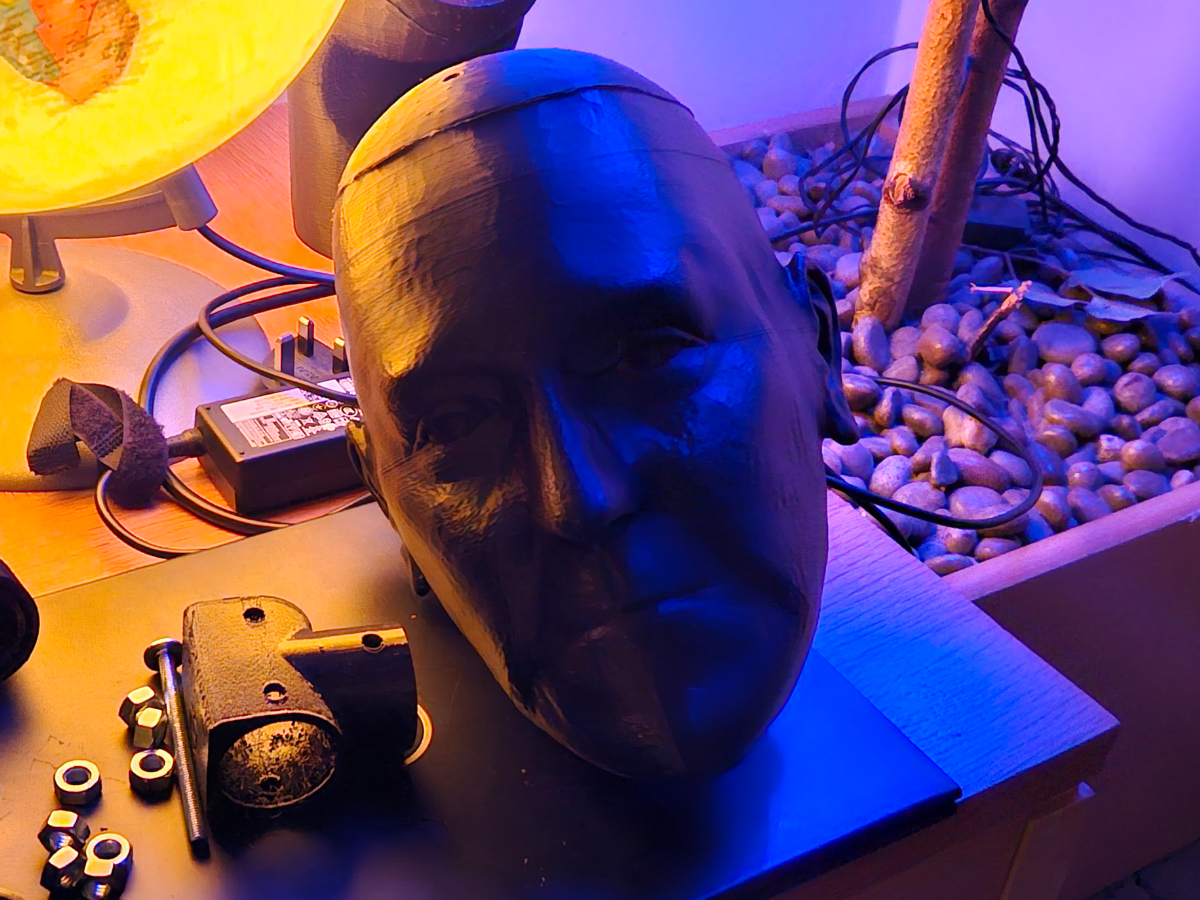
To borrow a quote from Alan Partridge: “…It’s fairly well concealed in casual clothing, but you don’t want to see me in my underpants”
And so began a long difficult journey into not only slice myself into manageable chunks, but also having to decide on internal supporting structures. I used plumbing pipe as the main framework.
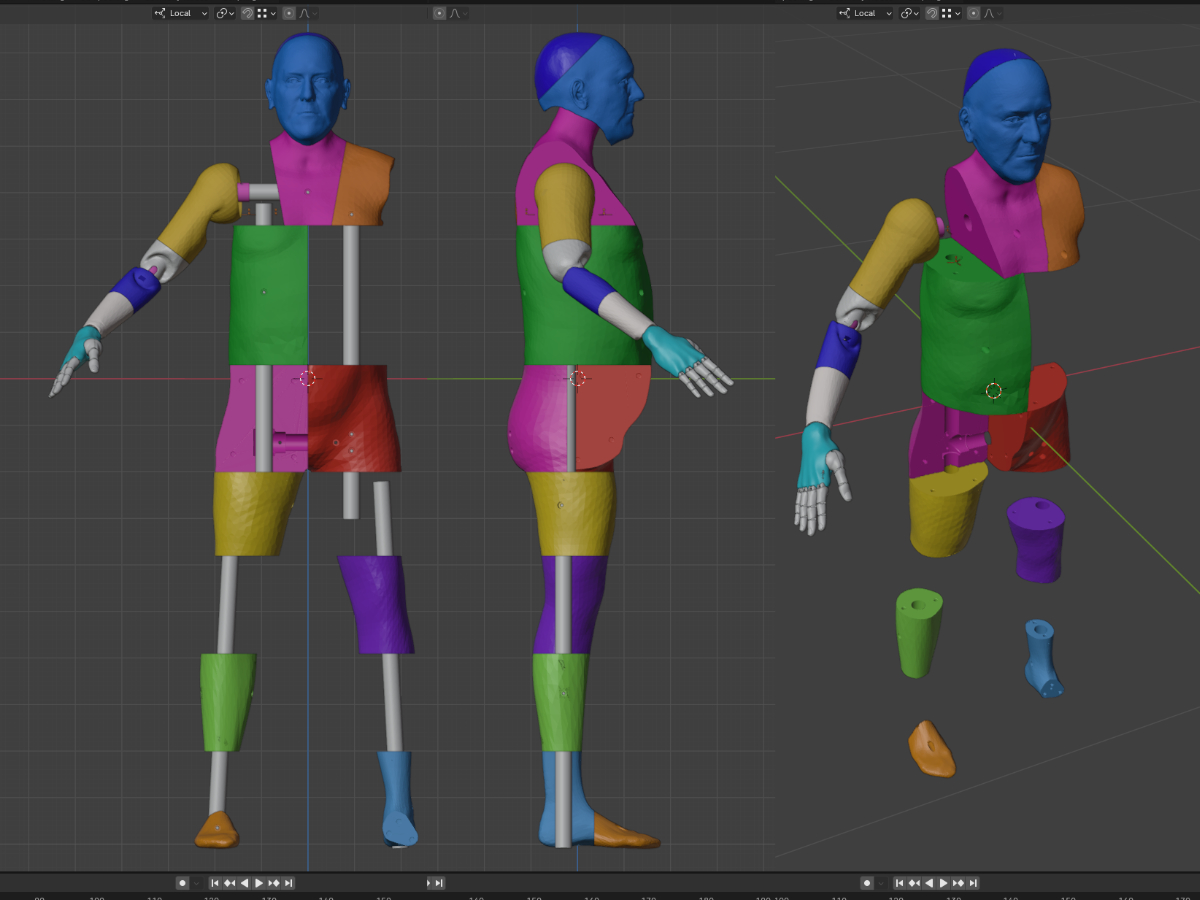
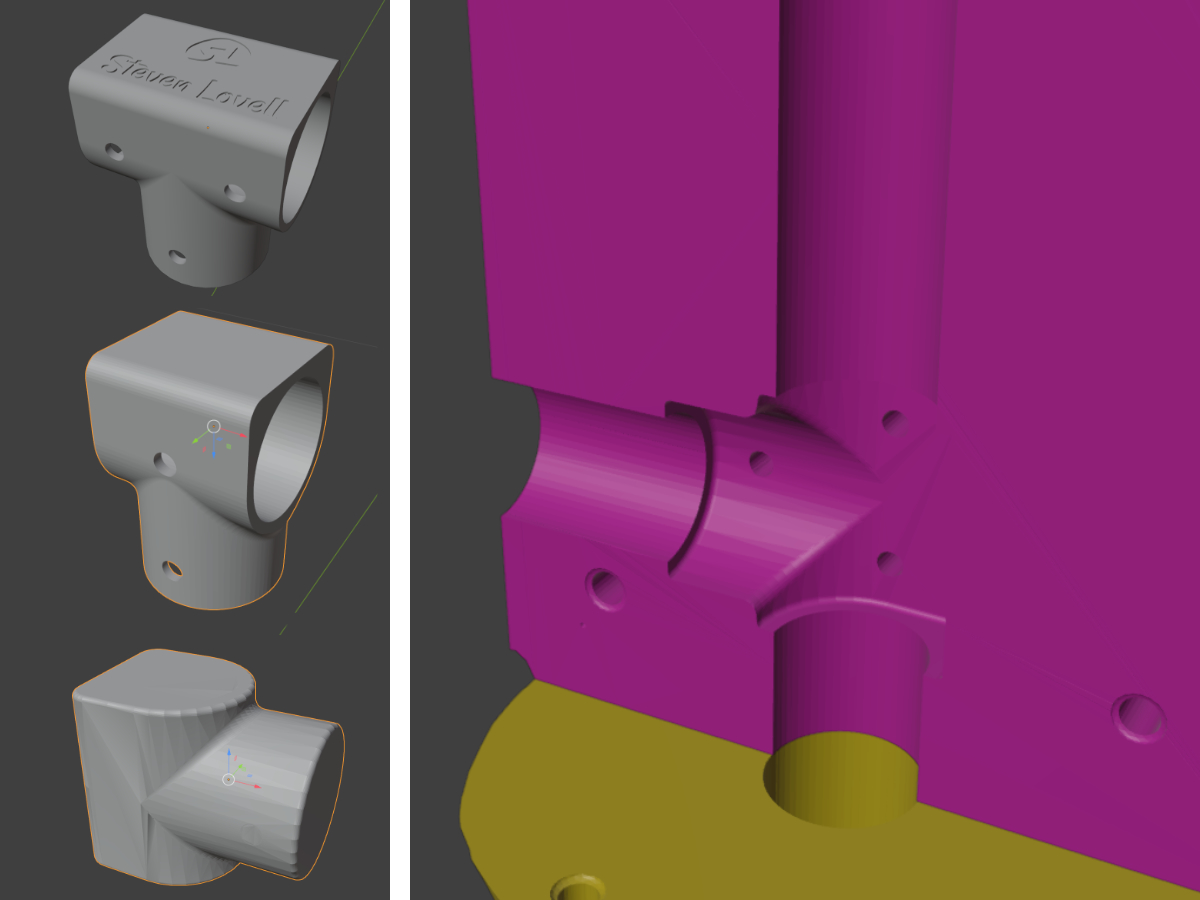
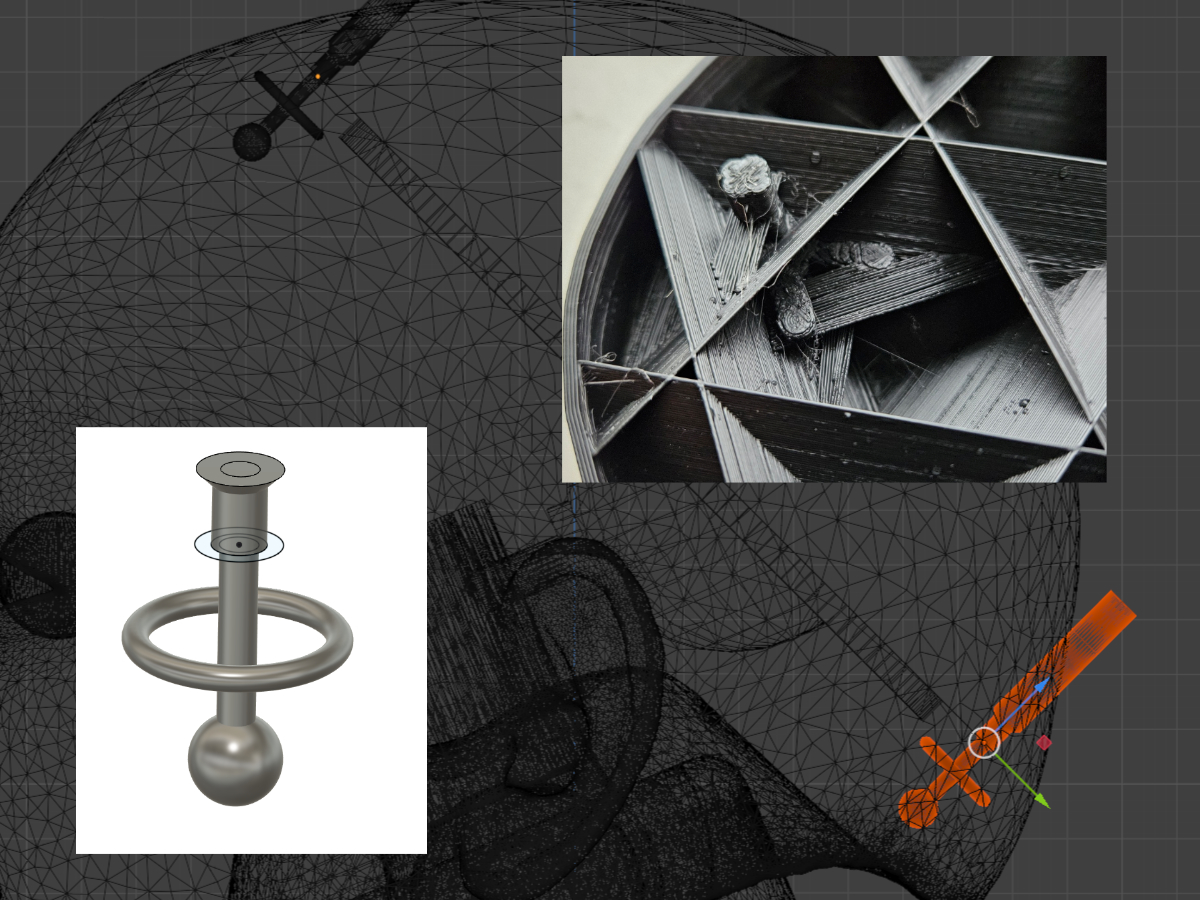
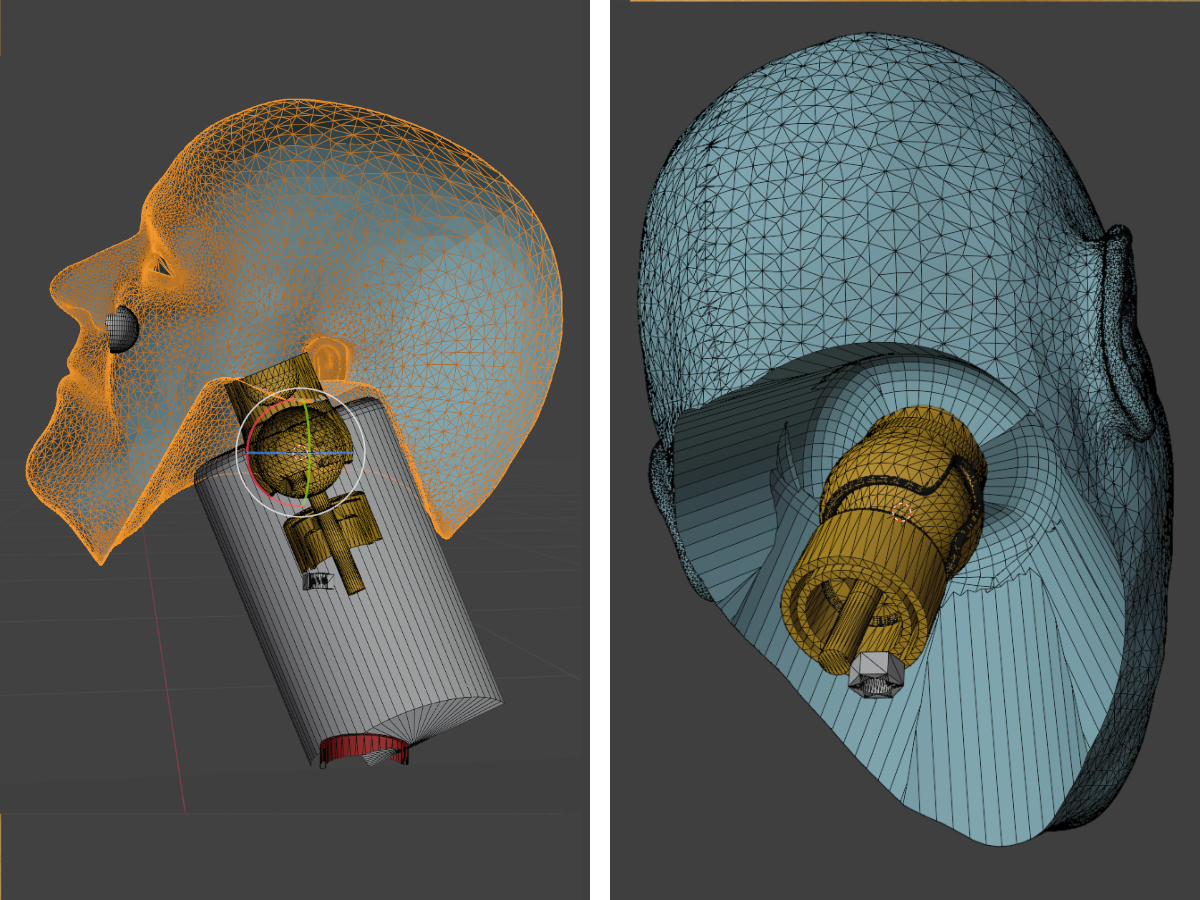
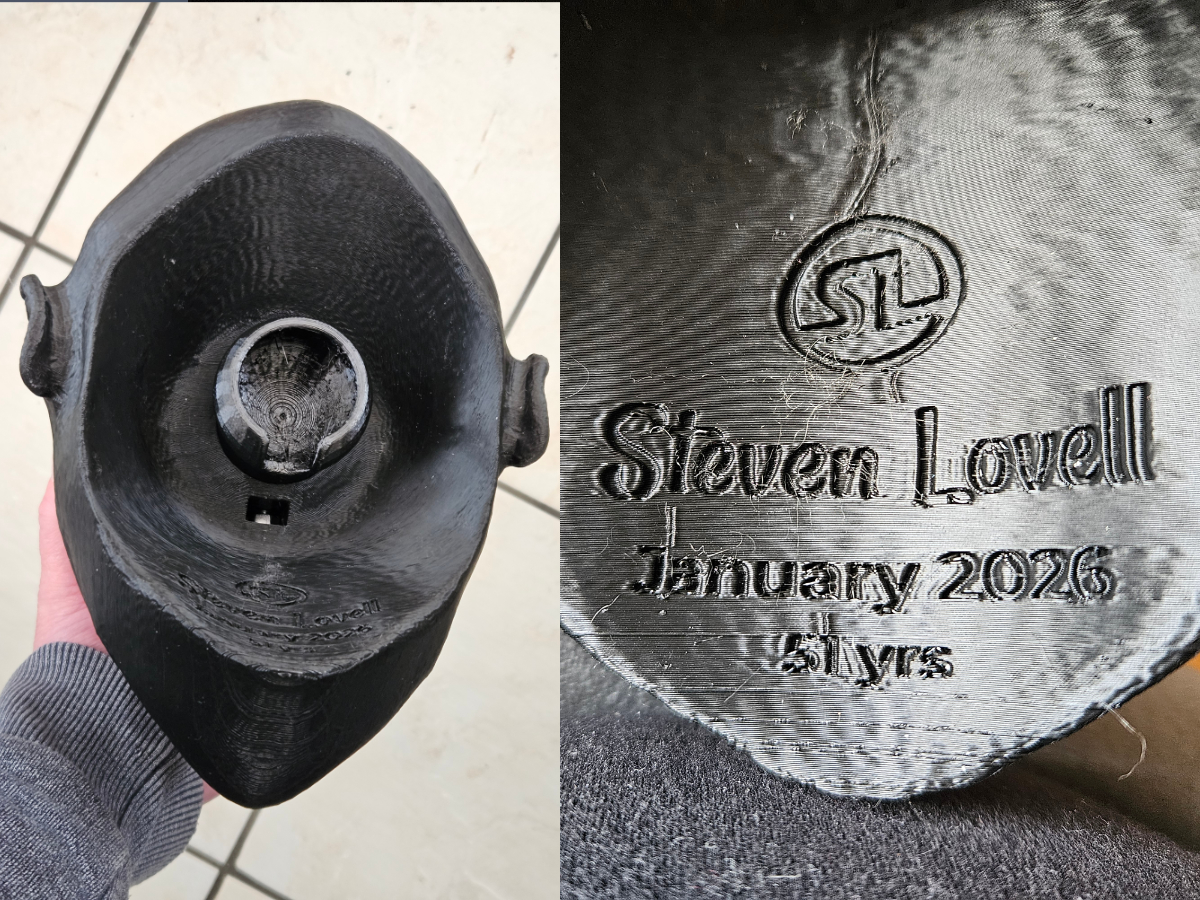
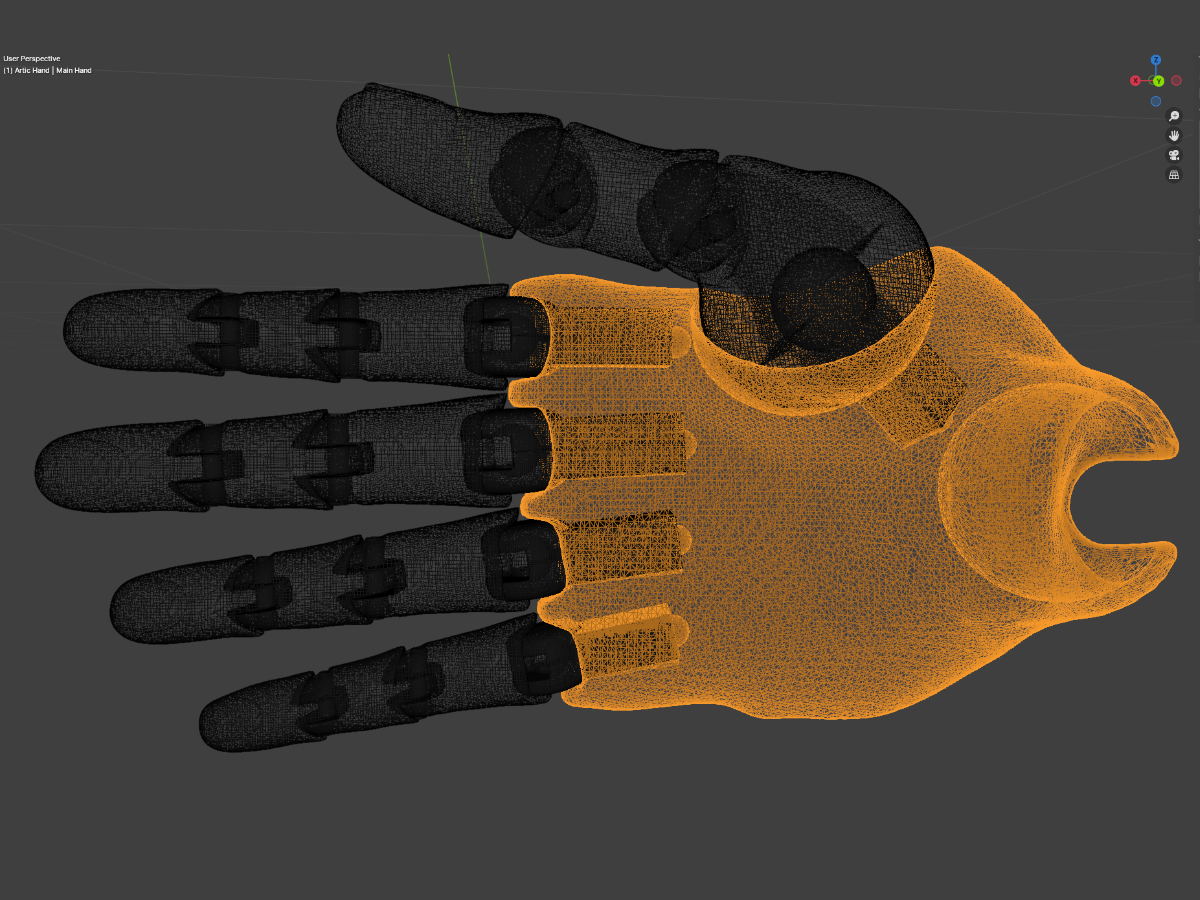
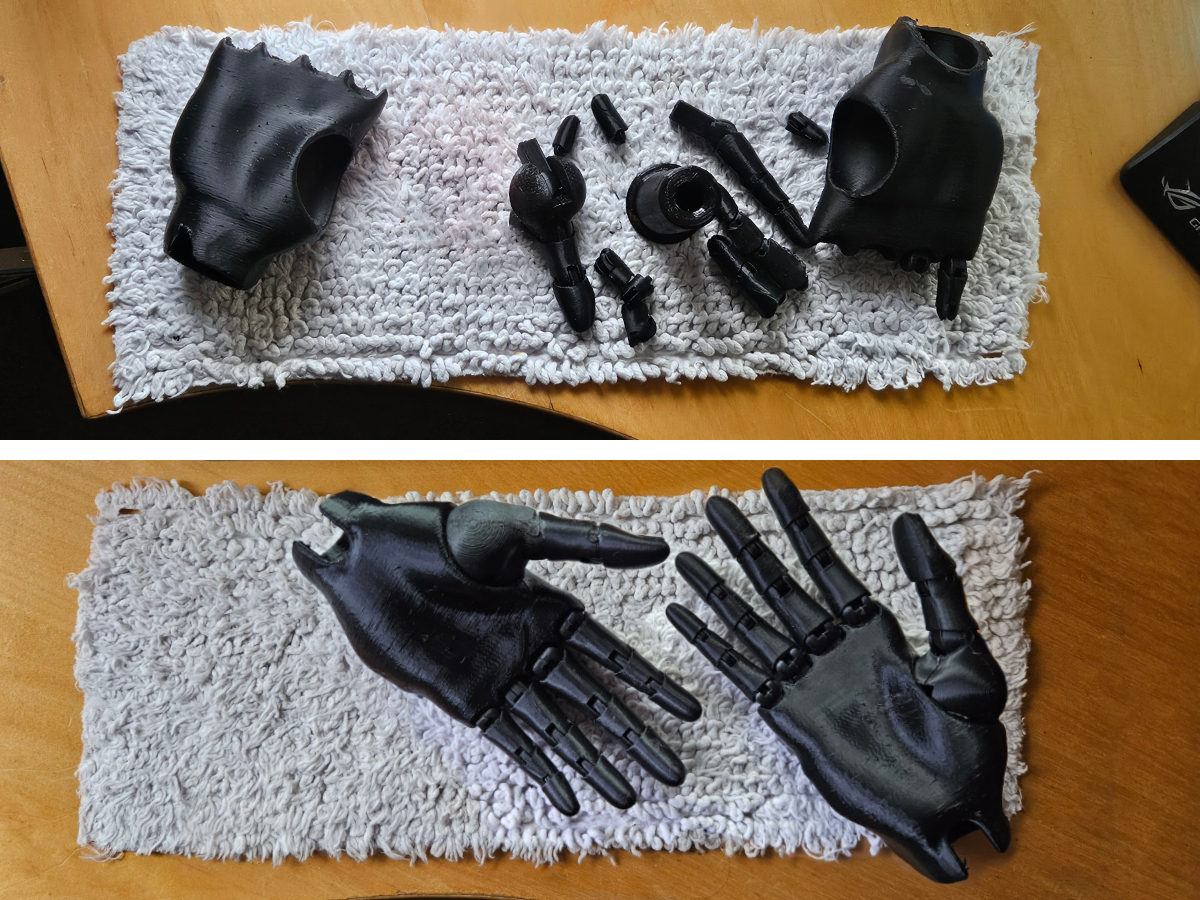
This image shows the joints all finished but for quite a while, it was just useless flat cuts between body parts. It still needed alignment dowel holes and functioning joints. Coming up with posable joints was a right old chore and I don’t work well or efficiently in 3D.
I devised my own 90° joints to 3D print because the ones you can buy for plumbing are actually 92.5°, and that would cause problems. These would all work well for a bare frame, but as I was encasing them in body parts, I eventually abandoned them all as the figure built up. The “Tee” joint also went through some changes as it was made slimmer. I also made a filled larger version (for tolerance) to then cut out the recess in the chunks they were intended for. Like a maniac, I also debossed my name into the first version.

As well as structure joints and ball joints, I also needed to model in a lot of negative spaces. These were for things like dowels and bolt holes etc.
Here’s a closer view of a lot of negative space parts. that would be digitally carved out of body chunks with Boolean operations before 3D printing.
Because the 3D parts weren’t going to be solid, any hole recesses needed some sort of additional negative spaces around them so that the 3D slicing process would be forced to generate internal walls around empty space deep in the parts. These extra walls would provide support against dowels being pushed into largely empty space in low percentage infill. This image shows the model in the background, a negative space part, and the inside of a 3D part with infill at about 3%, with some walls around negative support shapes. This caption is long and boring and technical because shitting crikey, that’s how it was for me.

I created a cantering jig for drilling holes straight through the middle of solid golf balls. I also had to model sockets that could be put onto the end of pipes (or modelled directly into body parts.
Some ball joints were solid golf balls, and some were 3D printed with semi-flexible TPU plastic. The 3D printed ones were less hassle because they had a bolt hole and head recess modelled in already. And the bolt head was already hexagonal rather than round, so no unwanted movement.
Sculpting the head was interesting and probably the most artistic aspect of the project. I had tried getting my likeness via a photogrammetry app called Kiri Engine. The result (in yellow) was vague and not very helpful. So I just ended up doing the sculpt of my features onto the base model manually, based on reference photos.

I determined the areas to cut out of the head (and other joint areas) by moving parts about to a limited degree of motion, removed that overlap and moved to another position to do the same. I them smoothed it out. I then added further more precise recesses for fittings.
Here’s the underside of the printed head, showing the bolted in socket and a debossed indication of my secondary logo, name, when this was done and how old I was. This unnecessary hidden feature was an absolute bastard to achieve and took many hours of grief. I eventually achieved it through methods that non-standard and counter-intuitive. Using these directions in case it helps anyone. https://www.youtube.com/watch?v=TNTYWL5UFao)
The head was purposefully done in two parts so that it would sit flat on the print bed without lots of unstable or disruptive supports.

An unfortunate side effect of the head join was that it makes me took like I have a weird short Mark Zuckerberg haircut circa. 2022.

I bought a digital model of an articulated hand, but then amended it to accommodate my ball joint socket. The hand went through several stages of editing and printing that were ultimately mostly reverted because of a sizing anomaly. So that chewed up at least two days of trial and error. I also changed from printing the main hand part in very rigid PLA plastic to semi-flexible TPU.
Preparing and assembling the hands was difficult and faffy. Also, on the day they were added to the body, they fell to the floor and smashed all of the small brittle ball joints in the metacarpal knuckles. So I had to redo eight pieces in TPU and reassemble. Consequently, the hands took a further two days of putting together separate to the digital shenanigans. Aaargghh!
For this project I decided that i Needed a new additional 3D printer. And it would be bigger than the first two. My first was a Creality Ender 3. (No longer used). I now use a Creality Ender 3 V3 SE and the new Ender 3 V3 Plus. Here it is before assembly, and having just printed a massive chunk of my chest and abdomen that my older printer couldn’t have managed.
I had to create and print a plug to go into the leg pipe so that it could use the same spigot that the George mannequin uses to stand on his base.
Here are some stages of assembly before all parts were done that saw me lose the cross-pipes because the body chunks did the same job.

Approximately 2kg of wastage due to failures, redesign, corrections or deprecation.
However, it’s only about £10/Kg.
Here I am, regrettably down to my underwear again for an honest comparison with my slightly less-fat plastic twin.
Face to face. The neck was never meant to be accurate, it just had to be functional. You can’t have a fat neck and unflattering jawline work as a ball joint.

Issues

Although the parts from the waste up are moveable, they are not strictly poseable. This is because the joints lack enough friction to support the weight of the parts. I could try to address this through a change of materials and part tolerances, but it’s been a long month of development to get this far and I just can’t be bothered right away. This pointing pose was only achieved through jamming a black glove into the armpit. Making it black also makes it a bit difficult to make out detail in lots of light conditions. Especially in a miserable winter month when it was finished.
The vast majority of this build is “PLA+” plastic and although that’s less brittle than standard PLA, it’s still as fragile as Donald Trump’s ego. I think I’d model in use of longer bolts in some places and devise a way to make drilling through pipes-in-place more predictable. I would also possibly print it with more use of TPU, because it’s very resilient even if it can be less neat.

Stats

Weight: 11Kg
Height: 1730mm
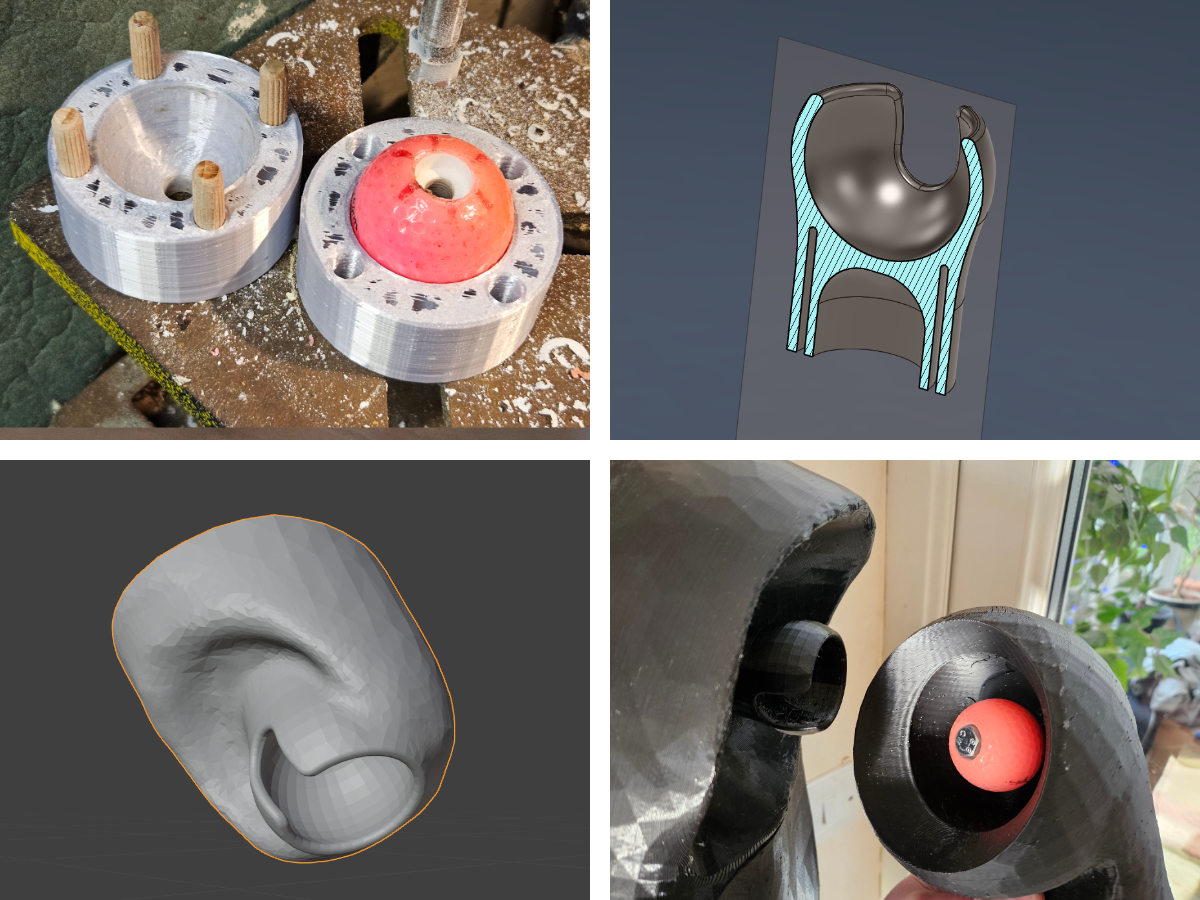
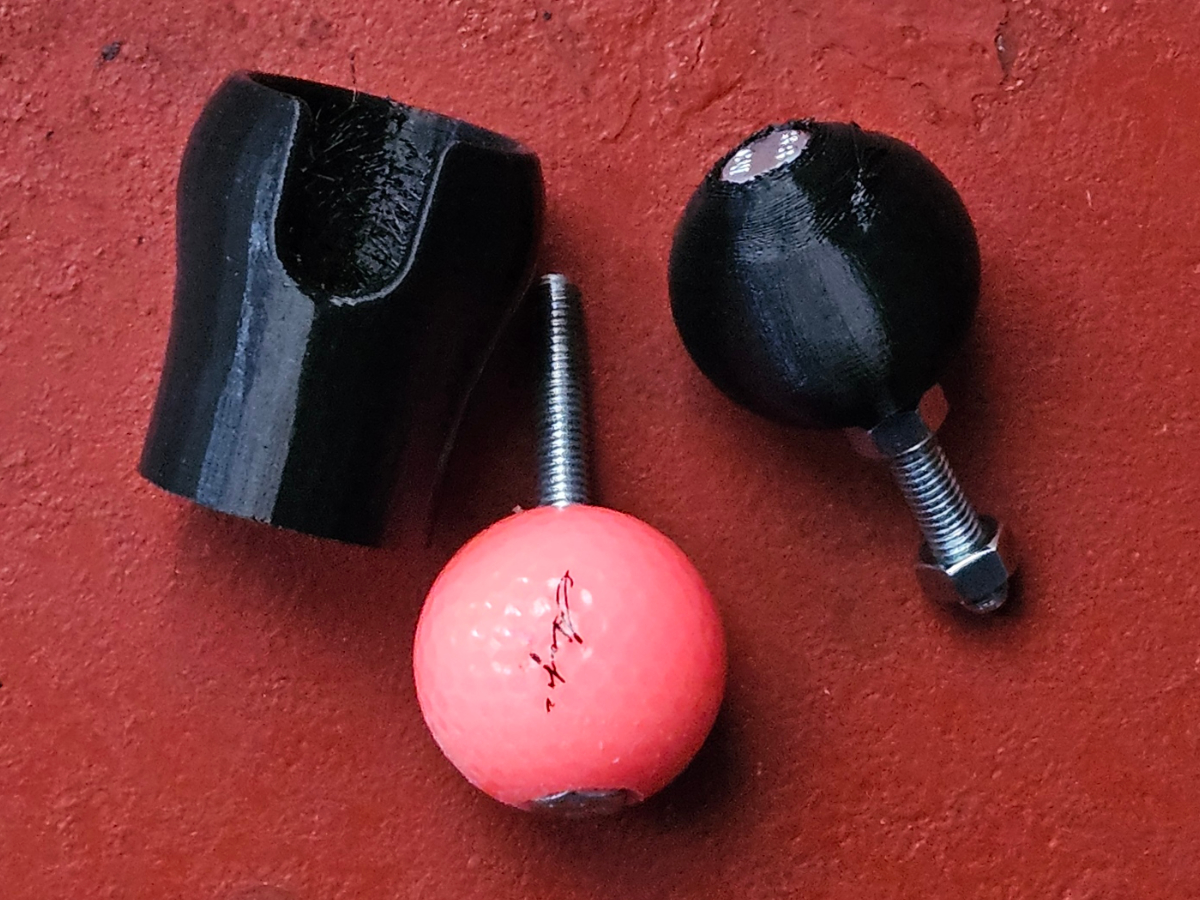
Materials: PLA plastic, TPU plastic, Hot Glue, Wood Dowels, PVC Pipe, various bolts and screws. A few solid golf balls.
Cost: About £150

Later / Current Status

At the time of creating this page, it’s brand new, so too soon to say.